• Whole Home Solutions
  • Color, Style, & Fabrics
  • Residential Applications
  • Right Environment
  • Human Centric Lighting
  • Tunable White & Color Control
  • Smart Buildings
  • Color, Style & Fabrics
  • Service Overview
  • Market Segments Market Segments
  • Case Studies
  • Dimmers & Switches
  • Fan Controls
  • In-wall Sensors
  • Wallplates & Accessories
  • Commercial Lighting Overview
  • Code Smart Guestroom System
  • Contract Roller
  • Hyperion Solar-adaptive Shading
  • Ketra Lighting
  • Finiré Downlights
  • Lumaris Tape Light
  • LED Upgrades
  • Vive Fixture Control
  • Service Offerings
  • Replacement & Upgrade
  • Service FAQs
  • Technical Documentation & Support Overview
  • Specification Guides
  • Product Specification Submittals
  • Performance Specifications
  • Installation Instructions
  • Wiring Diagrams
  • CAD Downloads
  • Revit Downloads
  • Engraving Sheets
  • Product Customization Forms
  • UL Conditions of Acceptability
  • Technical Papers
  • Application Notes
  • Technical Reference Guides
  • Design & Configuration Software
  • Product Selection Tools
  • User Guides & Videos
  • Technical FAQs
  • Legacy Products
  • Customer Support
  • Serena Shades
  • Not Sure Who to Contact?
  • Dimming Basics
  • How to install a dimmer
  • Quick & Easy Troubleshooting
  • What is Light Control?
  • Energy Efficiency
  • LED Center of Excellence
  • Technologies
  • Glossary of Terms
  • Codes & Standards, US & Canada
  • Commercial Application Guides
  • Energy Saving Strategies
  • Energy Benchmarking
  • Continuing Education (CEU)
  • North America Locations
  • Lutron Worldwide
  • The Lutron Experience Center
  • Media & Press Center
  • International Contact Information
  • Provide Site Feedback
  • Register or Login to myLutron
  • United States | English (US)
  • Where to Buy

How can we help you today?

Product Selection

Product Selection

FAQs Documents

FAQs Documents

Troubleshooting

Troubleshooting

Popular Topics

  • Cleaning Recommendations for Lutron Products
  • Help wiring your dimmer
  • All your 0-10V questions answered
  • Find the correct LED bulb or LED Dimmer

Palladiom Shading System

lutron homeworks shades

The Palladiom Shading System redefines the beauty of daylight control. Available as a wired or wire-free, battery-operated system these shades look beautiful from every angle, and are designed to be installed without a fascia, pocket, or recess in exposed applications.

overview

Palladiom Bottom Rail

To accentuate the minimalist aesthetic of the Palladiom Shading System, Lutron has created the inventive Palladiom Bottom Rail. The design uses a groundbreaking method of clamping onto the fabric – regardless of the fabric thickness – to ensure that the hembar will always sit perfectly flat and perpendicular to the fabric plane. The subtle curve along the hembar face matches the roll diameter at the top of the shade. When the shade is fully open, the hembar disappears into the negative space behind the shade itself.

lutron homeworks shades

Design Options

End bracket.

Ideal for mounting on or above a window frame, the end bracket beautifully showcases each hand-finished surface. The arm and the foot of the bracket are the same depth, giving the overall aesthetic balance and grace. End brackets can be mounted to the wall or to the ceiling.

lutron homeworks shades

Center Bracket

Designed to structurally support two adjacent shades on a single bracket for a clean aesthetic that maintains a minimal light gap. Center brackets can be mounted to the wall or to the ceiling.

lutron homeworks shades

Jamb Bracket

The simplest of the three forms, the jamb bracket is designed to sit elegantly inside a window frame. The minimalist geometry extends the roller tube outward and into the wall, and the shade appears to float in midair.

lutron homeworks shades

Shade Bracket Finishes

lutron homeworks shades

Black Anodized

lutron homeworks shades

Clear Anodized

lutron homeworks shades

Satin Nickel

lutron homeworks shades

Satin Graphite

lutron homeworks shades

The bottom rail of the Palladiom Shading System features distinctions no other shading system can match. Made of extruded aluminum, this design required an entirely new manufacturing and finishing process, much of which is done by hand. Thanks to a rubber fabric-pinching spline, it sits parallel to the window sill, without tilting one way or the other – and when the shade is raised, the bottom rail is shaped to fit perfectly in the negative space behind the roll. When visible, the Palladiom Bottom Rail is only 3/8” high, making it an extremely minimal and elegant aesthetic.

lutron homeworks shades

*The Palladiom bottom rail is only available in Pure White, Clear Anodized, Black Anodized, and Satin Nickel.

Other Hembar Styles

Palladiom shades are available with a variety of other hembar options, from styles that are fabric-wrapped, to hembars that show off metal finishes. In addition, Palladiom shades also features Lutron’s patented Intelligent Hembar Alignment, which uses a two-part electronic control system to maintain synchronized hembar alignment within one-eighth of an inch during motion, and at all resting positions – in one room or in your entire home. Shown here: Half-wrap architectural bottom bar in Satin Nickel. End caps available to match all Palladiom shade bracket finishes.

lutron homeworks shades

The Palladiom keypad is a superbly crafted instrument that rises to the level of art, both inside and out. The buttons have a crisp, tactile feel. It’s equipped with Lutron’s exclusive Dynamic Backlight Management™, self-adjusting illumination that provides the right brightness for any ambient lighting conditions. And it’s available in a variety of materials and colors. It’s a picture-perfect device for fine-tuning your environment. Learn more >

lutron homeworks shades

Clear White Glass | CWH

lutron homeworks shades

Clear Black Glass | CBL

lutron homeworks shades

Bright Brass | BB

lutron homeworks shades

Satin Nickel | SN

lutron homeworks shades

Satin Chrome | SC

lutron homeworks shades

Bright Nickel | BN

lutron homeworks shades

Polished Graphite | PG

lutron homeworks shades

Antique Brass | QB

lutron homeworks shades

Sienna | SI

lutron homeworks shades

Light Almond | LA

lutron homeworks shades

Almond | AL

The Palladiom thermostat isn’t just a device for setting temperature. Like the Palladiom keypad, it’s built to tight tolerances, features satisfyingly tactile buttons, and comes equipped with Lutron’s exclusive Dynamic Backlight Management™, self-adjusting illumination that provides the right brightness for any ambient lighting conditions. It’s a wall control that enhances the décor of any space.  Learn more >

lutron homeworks shades

  • Pair and Configure a Lutron System with a Crestron Home® System

Lutron HomeWorks QS, HomeWorks QSX, RadioRA 2, RadioRA 3, and RA2 Select systems can be integrated into a Crestron Home system to enable control of Lutron lights, shades, and fans. The Lutron devices can be controlled from a user interface device such as a Crestron touch screen, TSR-310 handheld remote, iOS® device, and Android™ device.

Lutron RadioRA3, Homeworks QSX, and RA2 Select processors and their configurations cannot migrate to a different Crestron Home processor. During the pairing process, a unique certificate is created that allows communications between the two processors. If the system is migrated, the Lutron system must be paired and reconfigured.

  • It is recommended that the names of the Lutron areas match the names of the rooms in the Crestron Home system. This will allow the Crestron Home system to automatically import the matching areas. Non-matching areas will need to be added individually on the Pair Devices screen.
  • One Lutron system can be added to a Crestron Home system.
  • Crestron Home allows 50 light scenes and 50 shading scenes per room. For details, refer to Quick Action and Scene Limits .
  • For Lutron RadioRA2 Select systems, only areas that contain keypads that control lights, fans, or shades will be added to the Crestron Home system.
  • Phantom Keypads that are part of a HomeWorks QSX system are imported and provide greater flexibility and functionality for the system.
  • The Lutron area cannot be renamed.
  • Add a Lutron System

To add a Lutron system, complete the following procedures:

  • Discover and Pair the Lutron System
  • Add the Lutron Areas and Scenes
  • Rename Lutron Button
  • Configure the Lutron Scenes (RA2 Select Systems Only)

To discover the Lutron system and pair it with a Crestron Home system:

lutron homeworks shades

Tap Manage Gateways in the Device Types menu. The local network is scanned for gateways that can be added to the Crestron Home system. Discovered gateways appear under the Gateways on Network menu.

NOTE: If necessary, tap Recheck Network to rescan the network for available gateways.

lutron homeworks shades

Select the Lutron system from the Gateways on Network menu and then tap the plus button ( + ) to add it to the system.

lutron homeworks shades

When the prompt appears:

RA2 Select and HomeWorks QSX Systems

Press the Add , Program , or pairing button on the Lutron device. The Crestron Home system and the Lutron system will establish a connection. To stop the pairing process and return to the Gateways screen, select Cancel .

lutron homeworks shades

Enter a descriptive name for the gateway and then tap OK .

lutron homeworks shades

HomeWorks QS and Radio RA2 Systems

Enter a descriptive name for the system along with the user name and the password for the system and then tap OK .

lutron homeworks shades

NOTE: When the Lutron system is added to the Crestron Home system, the Lutron folder becomes available in the Device Types menu on the Pair Devices screen.

NOTE: Scenes are added for RA2 Select systems only.

Tap Lutron in the Device Types menu.

lutron homeworks shades

The Auto-Add Lutron Equipment dialog box is displayed and lists Lutron Area names that match room names in the Crestron Home system. The Lutron areas with matching room names can be automatically added to the rooms in the Crestron Home system. To automatically add the Lutron Areas (and equipment) to the indicated rooms, tap Yes , or tap No to manually add the Lutron Areas to rooms.

  • Lutron areas that do not have a matching Crestron Home room names are added to the Lutron Area menu and must be manually added to a room.
  • To manually add a Lutron area to a room, refer to Add Lutron Areas to Rooms .
  • Tap the Rescan button to scan the Lutron system for new Lutron areas and new equipment. For details, refer to Rescan the Lutron System .
  • After the Lutron system is added and Lutron is selected from the Device Types menu for the first time.
  • After the Rescan button is pressed and matching room names are discovered.

lutron homeworks shades

(For RA2 Select Systems Only) The Auto-Add Lutron Scenes dialog is displayed and lists the Lutron Scenes that can be imported. The Lutron Scenes are placed in the Whole House room in Light Scenes and Shade Scenes configuration pages. To add the Lutron Scenes to the Crestron Home system, tap Yes . Tap No to skip the Lutron Scene import process.

If No is selected, the Lutron Scenes are not added to the Crestron Home system. To add the Lutron scenes, refer to Rescan the Lutron System .

  • A Lutron scene cannot be imported if the scene name already exists in the Crestron Home system or matches a Crestron Home reserved scene name (All On, All Off, All Open, All Closed). The scene name is displayed in red text if a scene name conflict exists.
  • Lutron scenes that control both lights and shades are imported as separate light and shade scenes but retain control of all devices in the scene. For example, the lights and shades are adjusted to their scene levels if the Lutron shade scene or the Lutron light scene is recalled.
  • To scan the Lutron system for new Lutron Scenes, tap Rescan . For details, refer to Rescan the Lutron System .

lutron homeworks shades

  • Add Lutron Areas to Rooms

This procedure is required for Lutron areas that must be manually added to the Crestron Home system.

NOTE: Only one Lutron area can be added to each room in the Crestron Home system.

To add a Lutron area to a room:

  • Select the room where the Lutron area is installed from the Select a room menu.

Select the Lutron area from the Lutron Area menu and then tap the plus button ( + ) to add the Lutron area to the selected room.

lutron homeworks shades

The Lutron Area is added to the room and displayed as a Lutron Area folder in the room. Lutron loads (lights, shades, and fans) are also added to the room.

lutron homeworks shades

Rename Lutron buttons with user-friendly names. The name of the button is displayed in the Crestron Home user interface.

NOTE: Lutron buttons are placed in the Light Scenes and Shade Scenes screens when the Lutron system is imported. The buttons function as scenes in the Crestron Home system.

Tap the Configure Lighting Scenes button or Configure Shade Scenes button on the Setup Scenes screen to display the Light Scenes or Shade Scenes screen.

  • Select a room from the List of Rooms menu.

lutron homeworks shades

  • Tap the Lutron button from the List of Scenes menu and then enter a new name for the button. The name assigned to the scene will be displayed in the Crestron Home user interface.
  • Assign All On, All Off, All Open, and All Close Scenes

Assign room-level All On and All Off light scenes and All Open and All Close shade scenes to Lutron buttons. When the All On and All Off light scene and All Open and All Close shade scenes are configured, the On/Off or Open/Close functionality of the tile in the Crestron Home User Interface is enabled.

  • The Lutron keypad must be able to provide LED feedback to assign an All On, All Off, All Open, or All Close scene.
  • To make sure that the Crestron Home user interface provides accurate feedback, set the LED Logic to Scene in the Lutron programming software.
  • Crestron® lighting components create All On and All Off scenes and shading components create All Open and All Close scenes when they added to a room. Lutron scenes cannot be assigned as the All On, All Off, All Open, or All Close scene if the scenes already exists in the room. To remove the All On and All Off light scenes or All Open and All Close shade scenes, the room must be removed and then re-added to the system. For details, refer to Rooms .

To assign the All On, All Off, All Open, and All Close scenes:

lutron homeworks shades

Select All On , All Off , All Close , or All Open from the Select Scene Type menu and then tap the Save button. The scene name is changed to All On, All Off, All Close, or All Open depending on the selection made.

NOTE: Select Standard from the Select Scene Type menu to reset the scene to normal operating mode. The scene name reverts to its last known name.

lutron homeworks shades

Rename Lutron Scenes and Enable Visibility

To view the scenes in the Crestron Home user interface, the scenes must be made visible in the desired room. The name of the scene is displayed in the Crestron Home user interface and must be provided a user-friendly name.

  • Lutron scenes are stored in the Whole House room in the Light Scenes and Shade Scenes configuration screens.

lutron homeworks shades

Rename Lutron Scenes

To rename the scene, tap the name of the scene in the List of Scenes menu and then enter a new name for the scene. The name assigned to the scene will be displayed in the Crestron Home user interface.

lutron homeworks shades

Configure Scene Visibility

Lutron scenes are hidden when they are imported into the Crestron Home system. To use the Lutron scene in the Crestron Home user interface, the scene must be enabled.

To enable the Lutron scene:

  • Tap the Lutron scene and then tap the eye icon. The Show Scene In dialog box is displayed.

Select the room(s) that should display the Lutron scene.

lutron homeworks shades

Tap the Save button to accept the changes.

  • Rescan the Lutron System

Rescan the Lutron system to import changes that were made to the Lutron system or to import individual Lutron lights, shades, and fans into the system.

NOTES: When the Lutron system is rescanned, the Lutron system will be re-downloaded. Consider the following when rescanning the Lutron system.

  • Devices that have been added to the Lutron system will become available to the Crestron Home system.
  • Changes to Lutron scene names and keypad names will not be overwritten.
  • If a Lutron device was added to the Lutron system, the device can be added to the Crestron Home system.
  • If a Lutron area was deleted from the Lutron system, the device and its programming is deleted from the Crestron Home system.
  • If a device in a Lutron system is moved to different Lutron area, the existing device is deleted from the Crestron Home system and is added to the Crestron Home system as a new device.

Tap Rescan in the Lutron Area menu. The Crestron Home system scans the Lutron system for changes.

lutron homeworks shades

  • Best Practices for Lutron Systems

Keep the following in mind when integrating Lutron systems into your Crestron Home system.

  • To discover the Lutron system, the Crestron Home processor and Lutron processor must be on the same network and use the same network switch.

Use Lutron Designer Software to incorporate the desired functions in the Lutron system and then import those items into Crestron Home either as scenes or via button emulation. For example, use Lutron Designer Software to perform the following tasks:

  • Create Lutron button programming to control multiple Lutron lights, shades, or fans.
  • Create raise or lower events for multiple Lutron lights, shades, or fans.
  • To import Lutron loads and enable individual load control, the Lutron system must be rescanned. Discovered loads are added to the Crestron Home room containing the Lutron Area.

Individual Lutron lights, shades, and fans can be added to a Crestron Home scene or controlled using standard keypad programming. When creating scenes in the Crestron Home app, consider the following:

NOTE: Individual load control is available on HomeWorks QS, HomeWorks QSX, and Radio RA2 systems.

  • The Crestron Home system executes the scene by commanding each Lutron load to go to the specified level, one load at a time.
  • Lutron loads can be directly selected during keypad programming. Lutron loads can be selected for control when Lighting Load, Shade Load, Lighting Raise, Lighting Lower, Shade Raise, Shade Lower, and Ceiling Fan are selected from the Mode drop-down menu.
  • Although not directly selectable, Lutron loads can be selected for control through scene, quick actions (including sequences), room, and master selections when programming keypads. Lutron loads will be controlled when Scene, Quick Actions, Lighting Room, Shade Room, Master Raise, Master Lower are selected from the Mode drop-down menu. For details, refer to Button Actions .
  • Lutron fans can be turned on when Lighting Load is selected from the Mode drop-down menu. Set the On Speed for the fan in the fan settings screen. For details, refer to Lutron Fan Settings .

Wired light load performance when controlling Lutron loads via Crestron Home keypad programming and Scenes:

  • Loads are controlled in the order that the cabinet is wired.
  • There is a 0.1 second delay between each load that is controlled.
  • Twenty loads in a cabinet can be controlled in approximately 1 to 2 seconds.
  • Loads in multiple cabinets are controlled one cabinet at a time. For example, if there are two cabinets installed, loads in Cabinet A are controlled and then loads in Cabinet B are controlled.

Wireless light load performance when controlling Lutron loads via Crestron Home keypad programming and Scenes:

  • There is a small delay (about 0.8 seconds) between each light load that is controlled.
  • Controlling five wireless lights will take about 4.5 seconds.
  • Controlling 27 wireless lights will take about 17 seconds.

Wired and wireless shade load performance when controlling Lutron loads via Crestron Home keypad programming and Scenes:

  • There is a small delay between each shade load that is controlled.
  • When controlling 20 shades, there will be a 1- to 3-second lag between when the first shade starts moving and the last shade starts moving.
  • To emulate a Lutron button and a function within Crestron Home (for example, a Crestron Home scene), create a sequence that recalls the Lutron button and the Crestron Home function. For details, refer to Sequence .

Lutron loads can be included in a Quick Action when Scene or Sequence is selected from the Mode drop-down menu.

  • To control the Lutron load when Scene is selected from the drop-down menu, create a scene that includes the Lutron load and then select the scene when configuring the Quick Action. For details, refer to Create Scenes and Scene .
  • To control a Lutron load when Sequence is selected from the drop-down menu, add the Lutron load to the sequence and then configure it. For details, refer to Sequence .
  • Lutron shades will be excluded from Crestron Home shade groups. Lutron shade groups should be setup in the Lutron Designer software. Crestron Home will create shade loads for Lutron shade groups, and ungrouped shades.

Diagnostic and logging information is available for the Lutron loads. For details, refer to Diagnostics .

  • The Devices tab in the Diagnostics menu will include all Lutron loads in the same manner as Crestron loads.
  • The Lutron system does not report the online status of individual Lutron loads. The online and offline indicators reflect the state of the Lutron gateway, not the individual Lutron loads.

Unlike Crestron loads, the feedback received from Lutron loads will behave as follows:

  • When a scene is recalled, Crestron Home receives and reports the feedback immediately. Keypads will not flash their LEDs or display a bargraph indicating that they loads are changing.
  • For ramping operations (raise or lower buttons), the feedback will not update until the raise or lower operations is complete.

© 2024 Crestron Electronics, Inc.

All brand names, product names and trademarks are the property of their respective owners. Certain trademarks, registered trademarks, and trade names may be used to refer to either the entities claiming the marks and names or their products. Crestron disclaims any proprietary interest in the marks and names of others. Crestron is not responsible for errors in typography or photography. Specifications are subject to change without notice.

Patents  | Legal  | Crestron Europe Terms  | Privacy Policy  | Terms of Use  | Support

shades-support

Shades Support

Looking for help we've got you covered., explore knowledge articles.

Installation

Programming

Troubleshooting

How to Set Limits on Sivioa or Palladiom Shades

A standalone application refers to when Caseta, RA2 Select, RadioRA, or HomeWorks are not being used. 

The open and close limits determine the most open and the most closed points of travel for a window treatment. For a QS Wired, QS Wireless, or Palladiom shade, blind or drapery track, these limits can be set using the buttons on the drive itself.  

For QS / Palladiom Wired window treatments, these limits can also be programmed from a wired keypad. For QS / Palladiom Wireless window treatments, these limits can be programmed from a wireless keypad or remote that they are paired with. For help with any of these processes, please see the articles below.  

Link to setting limits article on QS / Palladiom Wired shade via wired keypad 

Link to setting limits article on QS / Palladiom Wireless shade via wireless keypad 

QS Drive End:

lutron homeworks shades

  Palladiom Drive End :

lutron homeworks shades

Step (1): Setting the open limit 

On the pictures in these instructions, “T”= tap and “H”=hold. 

1. Tap the open limit button and the indicator light on the drive will illuminate green 

Diagram  Description automatically generated

2. Press and hold the arrow buttons to move the window treatment to the preferred open limit. 

Diagram  Description automatically generated

3. Press and hold the open limit button until the green indicator light flashes. This indicates that the open limit has been stored. 

Diagram  Description automatically generated

Step (2): Setting the close limit 

1. Tap the close limit button and the indicator light on the drive will illuminate green 

lutron homeworks shades

2. Press and hold either of the arrow buttons to move the window treatment to the preferred close limit. 

Diagram  Description automatically generated with medium confidence

3. Press and hold the close limit button until the green indicator light flashes. This indicates that the open limit has been stored. 

Diagram  Description automatically generated

Step (3): Verify that the limits are set properly  

1. Press the open limit (white rectangle) button to check that the open limit is set where desired. 

Diagram  Description automatically generated

2. Press the closet limit (black rectangle) button to check that the close limit is set where desired.  

lutron homeworks shades

Would you like to provide additional feedback? Yes No

Choose how you would like to see content specific to your location.

  • Make this my default

Lutron Logo

Welcome to the Lutron Luxury Portfolio

Designer Spotlight

Designer Spotlights

Ketra D2 Downlight

Ketra D2 Downlight

Luxury Experience App

Luxury Experience App

Discover Lutron Luxury Image

Lighting, shades, and controls—limitless possibilities.

Integrations

Security, A/V, climate control, voice assistants—tying these components to the ecosystem is what makes a smart, luxury home truly intelligent.

Connect to Extraordinary

Visualize the lutron difference..

The Lutron Luxury Experience App brings the showroom to your iPad. Guide clients on an immersive, virtual journey where they can interact with Lutron products—and visualize designs in their home. Available now for iPadOS 16.4 or later.

Featured Stories

Discover the latest residential projects, design inspiration, and educational resources.

lutron homeworks shades

Project: Seaholm Penthouse

lutron homeworks shades

Designer Spotlight: Sasha Bikoff

lutron homeworks shades

Article: How to Light Artwork Like an Art Gallery

lutron homeworks shades

Project: Ritz Tower Residence

© Magda Biernat Photography

Lighting is more than what you see—it's a feeling.

Shades—an integral part of the light control system.

Shades—an integral part of the light control system.

© Magda Biernat Photography

Controls—crafted to create the personal touch.

Image gallery.

By room or by product category. Discover inspiring ideas for your residential lighting, shades, and control designs.

Living Room

Dining room.

lutron new york loft

  • United States
  • Middle East
  • Latin America
  • Register or Login to myLutron
  • Where to Buy

Residential Solutions

Commercial Solutions

Market Segments

Applications
Stand Alone Controls Residential Systems Commercial Systems Shading Systems Lighting Systems In-Fixture Technologies

lutron homeworks shades

Lutron Product Delivery Lead Time Update

Lutron Lead times are improving rapidly.

lutron homeworks shades

Discover Lutron Luxury

Connected lighting, shades, and hand-crafted controls that elevate everyday life.


Service
Technical Documentation &
Support

Customer Assistance
Mon-Fri: 8 AM – 8 PM (EST)
Sat: 9 AM – 6 PM (EST)

lutron homeworks shades

Specification Guides

The Specification Guides provide detailed product information to help you specify the right Lutron solution for your project.

New Lutron Support Center

Product specific FAQs Product specific troubleshooting Help finding the correct product Popular tools and resources Request color samples


Homeowner Resources

Energy & Sustainability

Lighting Control Institute

lutron homeworks shades

Lighting Control Institute

Want to learn about installing or programming Lutron solutions? Looking for best practices for selling or specifying? LCI offers online training and in-person workshops for industry professionals.

lutron homeworks shades

LED Control Center of Excellence

Visit our Control Center of Excellence for tools and resources to help you select, install, and use LEDs with confidence. Designed for homeowners and industry professionals.

About Us News & Events Contact Us
7200 Suter Road
Coopersburg, PA 18036-1299
1-610-282-3800 844-LUTRON1 (588-7661)

Using our programming software, you will be able to program, control and backup your Lutron systems.

The RadioRA 2 software download is a single file that includes the Designer software, the Essentials software, and can be upgraded to the Inclusive software. Use of the software requires a myLutron account.

By default, users will have access to the Designer mode of the software. The Designer software is intended to help specify RadioRA 2 jobs. It does not contain the ability to activate or transfer to a main repeater.

After completing RadioRA 2 Level 1 training, and the user’s myLutron account updated accordingly, the software will function as Essentials for up to 100 devices. The user may need to log-out of the RadioRA 2 software, and back in for the update from Designer to Essentials to take effect.

Qualified L2 dealers/installers can upgrade their software version from Essentials to Inclusive. The Inclusive version will enable support for a 200 device system by enabling the addition of a 2nd main repeater to the system. Qualified L2 dealers/installers can follow the instructions in the “Help->Upgrade” menu option in the software to upgrade the version to Inclusive.

For questions on how to become a qualified L2 dealer/installer, please contact your local Lutron representative.​

(contains RA2 system recommendations for PC and MAC computers) ​


Lutron Designer+ enables specifiers, contractors, distributors, Lutron reps, or other commercial building professionals to design Lutron lighting and shading systems and generate comprehensive system design documentation (e.g. Bill of Material, One-line Diagram, and Sequence of Operations).

This tool is ideal for Lutron commercial projects including Athena, Vive, QS Standalone, GRAFIK Eye QS, Energi Savr Node, Quantum, and myRoom systems.


Trimble Accubid is an estimating software used by electrical contractors to create estimates and bid on jobs. The software now enables the users to view pricing and labor estimates for Lutron products including Vive, Energi Savr Node, Grafik Eye, and more.

Download the Lutron Product Database file at the below link to access Lutron products in your Accubid software.


, or call us at 1.888.LUTRON1 (588-7661).
Customer Service      1.888.LUTRON1(588-7661) (8 am - 8 pm EST) Technical Support 1.800.523.9466 (24/7)
  • Serena Shades Store
  • Related Sites
  • Online Training (LCI)
  • myOrders Login
  • eMaps Login
  • Customer Support
  • Online Support Center
  • Lutron Support Community
  • Customer Assistance
  • International Support & Contact
  • Provide Site Feedback
  • Important Safety Notice(1)
  • © 2024 Lutron Electronics Co., Inc
  • Privacy Policy
  • Cookie Preferences
  • Do Not Sell My Personal Information
  • Trademark Guidelines
  • Anti-Slavery & Human Trafficking Statements
  • Transparency in Medical Coverage

Lutron on YouTube

How can we help you today?

lutron homeworks shades

Product Selection

lutron homeworks shades

FAQs Documents

lutron homeworks shades

Troubleshooting

Popular Topics

  • Cleaning Recommendations for Lutron Products
  • Help wiring your dimmer
  • All your 0-10V questions answered
  • Find the correct LED bulb or LED Dimmer

Choose how you would like to see content specific to your location.

  • Make this my default
  • Whole Home Solutions
  • Residential Applications
  • Luxury Residential
  • The Right Environment
  • Human Centric Lighting
  • Tunable White & Color Control
  • Smart Buildings
  • Color, Style & Fabrics
  • Service Overview
  • Residential
  • Hospitality

Case Studies

  • Dimmers & Switches
  • Fan Controls
  • In-wall Sensors
  • LED+ Dimmers
  • Wallplates & Accessories
  • Commercial Lighting Overview
  • Code Smart Guestroom System
  • Shades Overview
  • Contract Roller Shades
  • Hyperion Solar-adaptive Shading
  • Ketra Lighting
  • Finiré Downlights

Athena Wireless Node

  • Service Offerings
  • Replacement & Upgrade
  • Service FAQs
  • Technical Documentation & Support Overview
  • Specification Guides
  • Product Specification Submittals
  • Installation Instructions
  • Wiring Diagrams
  • CAD Downloads
  • Revit Downloads
  • Engraving Sheets
  • Product Customization Forms
  • UL Conditions of Acceptability
  • Technical Papers
  • Application Notes
  • Technical Reference Guides
  • Design & Configuration Software
  • Product Selection Tools
  • User Guides & Videos
  • Technical FAQs
  • Legacy Products
  • Customer Support
  • Serena Shades
  • Not Sure Who to Contact?
  • Delivery Lead Time Update
  • Dimming Basics
  • How to install a dimmer
  • Quick & Easy Troubleshooting
  • What is Light Control?
  • Energy Efficiency
  • LED Center of Excellence
  • Technologies
  • Glossary of Terms
  • Codes & Standards, US & Canada
  • Commercial Application Guides
  • Energy Saving Strategies
  • Energy Benchmarking
  • Continuing Education (CEU)
  • Our Leadership
  • North America Locations
  • Lutron Worldwide
  • The Lutron Experience Center
  • Media & Press Center
  • International Contact Information
  • Provide Site Feedback
  • Register or Login to myLutron
  • United States | English (US)
  • Where to Buy

How can we help you today?

Product Selection

Product Selection

FAQs Documents

FAQs Documents

Troubleshooting

Troubleshooting

Popular Topics

  • Cleaning Recommendations for Lutron Products
  • Help wiring your dimmer
  • All your 0-10V questions answered
  • Find the correct LED bulb or LED Dimmer

Inteli staircase, Maurício Moreno

An uncompromising solution. The Athena lighting control system empowers architects, lighting designers, electrical engineers, and facility managers with a native network of lighting, lighting controls, shades, and cloud-connected software that deliver exceptional experiences and building management.

lutron homeworks shades

High-rise offices. College campuses. Five-star resorts. Lutron’s wireless technology and modular data system form a foundation for nimble, next-gen scalability.

lutron homeworks shades

Meet property needs over time. Design freedom during specification, customized conference halls for events, and lighting shifts to meet plan changes—all without rewire.

lutron homeworks shades

Streamlined

Maximize efficiency. Minimize disruptions. Wireless technology and cloud-powered workflows simplify specification, accelerate construction, and lay the groundwork for future system updates and expansion.

Athena Video

Applications

Public spaces, open offices, amenity spaces, learning spaces, patient rooms.

Atlassian kitchen

Make a great first impression with custom lighting that welcomes visitors and employees. Automatically balance lighting with daylight in your lobby, cafe, and other common areas to maximize comfort.

Ketra HQ open office

Give everyone a window seat. Set shades to perfectly balance natural and artificial light throughout your office. Promote well-being with light that shifts in color and intensity throughout the day.

Tamarindo restaurant

Design restaurants, fitness centers, and social spaces that inspire engagement and support well-being with the Athena Lighting System.

Kellogg Business School auditorium

Dial in the perfect light for any lecture hall or classroom with wireless controls that are simple, scalable, and integrate seamlessly with lighting retrofits—meeting code every step of the way.

MSK Koch Building patient room, Chris Cooper

Patients are under stress, so their rooms need to feel safe. With Lutron’s intuitively controlled presets, you can easily transform light from soothing dim to brilliant—bright enough for medical tests.

The theater at BlackRock's headquarters

New York City, New York

The Athena control system and over 9,000 Athena wireless nodes give BlackRock the granular control needed for their collaborative, innovative headquarters.

SOM office hallway, Dave Burk © SOM

Skidmore, Owings & Merrill (SOM) developed an occupant-centric design strategy for their new Manhattan office, prioritizing daylight, mobility, and sustainability.

Inteli staircase, Maurício Moreno

Inteli Educational Complex

Sao Paulo, Brazil

Inteli is the first project-based tech college in Brazil. To offer the most cutting-edge technology education in the country, it needed the most agile, powerful lighting system.

The Path to Product Innovation: Athena Wireless Node

The Path to Product Innovation

To create the Athena wireless node, Lutron’s engineers had to find a way to pack all of the essential technology into the smallest device the company has made to date.

SOM office open area, Dave Burk © SOM

Architected for Natural Light

Foster well-being throughout the interior, emphasize connection to the outdoors, and improve building efficiency with dynamic, day-synchronized light and shade control. The Athena system works with Lutron automated shades and Athena wireless nodes to make minute, real-time changes to light color, intensity, and shade position in order to emulate the cycles of the sun, while mitigating glare, reducing thermal gain, and maintaining views to the exterior. 

LinkedIn HQ seating area

Forward Looking and Backward Compatible

Athena is designed for the future but seamlessly integrates with earlier systems. Building on its portfolio of next-generation wireless controls and Ketra luminaires, the Athena system adds simple-to-spec 0-10V and switching DIN-rail modules to complete its suite of best-in-class centralized panel solutions. Coming in 2024—bring the Athena experience to existing Quantum systems.

Open office dashboard on tablet

Engineered for Comprehensive Growth

Tackle the largest, most demanding projects on the globe—all at once or a little at a time. A built-from-the-ground-up modular data system creates the building blocks for Athena scalability—by room, floor, or building—meaning the Athena system now easily exceeds what any prior Lutron solution could handle before.

Experience the difference. Discover Athena.

Book an appointment at a Lutron experience center.

Ketra HQ open office

Wirelessly Scalable

The coin-sized Athena wireless node delivers unbridled design freedom, redefining what scalable and adaptable mean for architectural lighting control.

Athena dashboard video

Cloud Powered

Add breakthrough functionality over time. Over-the-air software updates keep Lutron cloud-connected systems ready for what’s next.

Key Solutions

Athena Touchscreen

Athena Touchscreen

Palladiom Keypad

Palladiom Keypad

SeeTouch Keypad

SeeTouch Keypad

Wireless Pico Remote

Wireless Pico Remote

Wired Pico Remote

Wired Pico Remote

Contract Roller

Contract Roller

Palladiom Shades

Palladiom Shades

Power Supplies

Power Supplies

LED Retrofit Kit

LED Retrofit Kit

Lutron Dashboard

Lutron Dashboard

Lutron Designer

Lutron Designer

Athena Web API

Athena Web API

Processors and Interfaces

Processors and Interfaces

Load Controls

Load Controls

Integration Devices

Integration Devices

Emergency Lighting Interface

Emergency Lighting Interface

Wireless Sensors

Wireless Sensors

Wired Sensors

Wired Sensors

Links & Resources

Athena Technical Document

Specifications Documents

Installation Guides

Lutron LA Design Studio conference room

Have a question?

Contact a sales rep to help create, design, and deliver a complete solution for your workplace.

Lutron Support Community

  • What's New?
  • Mark Forums Read
  • Today's Posts
  • Terms of Use
  • Lutron Support Center
  • Advanced Search

Home

  • Legacy Residential Systems
  • HomeWorks QS
  • 3rd-party Integration - HWQS

Homeworks QS controlling Somfy Shades

  • If this is your first visit, be sure to check out the Welcome Post and the FAQ . In order to reply to a post or start a new thread, you will need to register : click the Register link above to proceed. To start viewing messages, select the forum that you want to visit from the selections below. Make sure to read the Terms of Use before using the Lutron Support Community Forums.

Thanks

Thread: Homeworks QS controlling Somfy Shades

Thread tools.

  • Show Printable Version

Search Thread

  •   Advanced Search
  • View Profile
  • View Forum Posts
  • Private Message

acculite is offline

Hi, Has anyone used the Somfy Connect device made by Somfy to have Lutron keypads control Somfy shades? I'm asking especially now that QSE-NWK is no longer supported in QS and the only way to use the Somfy Connect is via RS232. The instructions (attached) that come with the device utilize the QSE-NWK! Thank you

Attached Files

The last time I did it I used the VCRX CCO's and the Somfy CCI.
Convergence Technologies Raleigh, North Carolina www.convergenceusa.com
Thanks randyc but I'm looking for help specifically using the Somfy Connect device which does require the VRCX and Somfy CCI.

Blair S. is offline

Hello acculite, Thank you for your post. You can program the feedback commands that the Somfy Connect is looking for as an integration command set. Here is an app note that you can use a guide for how this is setup. http://www.lutron.com/TechnicalDocum...ntegration.pdf

drechambers is offline

I wasn't able to get the Somfy Connect LTI to work with HWQS. But it did work fine for RA2 Main Repeater. Followed the app note above but wasn't able to get anything working using the Somfy Connect LTI. It seems like Somfy Connect LTI isn't able to send login information to HWQS, it can only monitor/receive data. My guess is when connecting directly to the serial port on a QSE-NWK and RA2 Main Repeater there's not a login prompt like there is when connecting via telnet. I ended up just bypassing the somfy connect altogether and used an Ethernet to RS-232 adapter to a Somfy URTSII. Then followed the directions for Scenario 4 in the app note. I still only had limited success with button presses using a HQRD-W6BRL keypad. My guess is the RF signal from the keypad was interfering with the RF signal for the somfy transmitter. Because if I used the Home + app and pressed the same button it worked every time. I was also able to mimic the button press in Terminal to get the shades to work.
Thank you drechambers, I'm glad to see I'm not the only that was not able to get it to work. It's interesting how Somfy made and markets their own product that Lutron keypads can control their shades yet cannot provide instruction showing how to do it. All they provide is the document Blair S. provided and say contact Lutron if any issue. This document has nothing to do with the Somfy Connect and Lutron never intended it as specific instructions for any 3rd party integration just as a general option to try.
Are you not able to use a Ethernet to RS232 adapter for Somfy to see HWQS button press feedback? If not then you should be able to send the feedback commands from a button press by programming them as a command set. Feel free to send us a support file and a "outboundconnections" command printout after replicating the issue.

Bradley is offline

Failed experiences serialing QS to Somfy RTI

If anyone knows the answer please post. The only option may be to integrate using Contact Closures (EIO) In September of 2023 using Somfy instructions I attempted to serial integrate QS to Somfy...unsuccessfully. Learned Somfy parts, materials and schematics have not been updated for 5 years. They did not realize NWKs were a thing of the past. Your attachment serials QS to Somfy via an NWK > LTI > URTS II. NWKs are not supported in QS or QSX software. LTI works with QS using a NWK so its a loser, too. Set it and the NWK aside. Digi ONe SP is used in place of NW. It converts QS ethernet to serial strings. Failure 1 QS > Digi One SP > LTI > URTSI II. DigiOne configured per Lutron Integration Scenario 4 using Somfy's suggested Baud Rate of 9600. Failure 2 QS > Digi One > URTSI II via RS485 direct. Baud Rate 9600. I'm out of ideas. Note: QS > Digi One communication was not problem.
I bench tested with a Digi One to URTSII connection. Got nothing. Do you recall how the pinned out the connection between the two? In the QS integration protocol did you simply write 0101U 0101D (etc) or did you use hexidecimal? I think I may have to shift gears to contact closure control.
Here is the answer. QS/QSX to Somfy using contact closures is easiest... if there are not a lot of motors becasue, one UTSI RF contact box requires a dry set for open, close, stop. Example: To control 3 zones of motors 3 URTSIs and 9 Lutron dry contacts are required. So, if a lot of zones then a DigiOne SP is the answer. The trick is in the connections and Digi settings. HOW TO: Use Lutron Integration Scenarios 2 and 4...with the following deviations DigOne Settings: Dip Switches All Down (OFF) Port profile: "Serial Bridging" Peer to Peer IP use the Lutron processor address Port = 2101 Serial Settings: Baud: 9600 None 8 None Advanced Network Settings: Auto Auto 30 60 10 5 30 Enable Keepalive 0 1 0 CONNECTION BETWEEN DigiOne and URTSI II Standard LAN cable Connect one end into URTSI Cut other end off and get a Female RS232-RS485 Adapt. Connect as follows. ( TRENDnet RS232 to RS422 RS485 Converter Adapter, Serial Port Data Converter, Black, TI-S100) Ground: Brown-Brown/White RXD-: Green/White RXD+ Green Lutron: When adding the Ethernet Device set the port to 2101 and do not set up a user or password. This works.

Thanks

  • Private Messages
  • Subscriptions
  • Who's Online
  • Search Forums
  • Forums Home
  • Welcome to the Lutron Support Community
  • General Discussion - HWQSX
  • Troubleshooting - HWQSX
  • Design Assistance - HWQSX
  • Programming - HWQSX
  • 3rd-party Integration - HWQSX
  • Best Practices - HWQSX
  • General Discussion - RA3
  • Troubleshooting - RA3
  • Design Assistance - RA
  • Programming - RA3
  • 3rd-party Integration - RA3
  • Best Practices - RA3
  • General Discussion - RA2
  • Troubleshooting - RA2
  • Design Assistance - RA2
  • Programming - RA2
  • 3rd-party Integration - RA2
  • Best Practices - RA2
  • General Discussion - CAS
  • Troubleshooting - CAS
  • Design Assistance - CAS
  • Programming - CAS
  • 3rd-party Integration - CAS
  • Best Practices - CAS
  • General Discussion - Shades
  • Troubleshooting - Shades
  • Design Assistance - Shades
  • Programming - Shades
  • 3rd-party Integration - Shades
  • Best Practices - Shades
  • General Discussion - LED
  • Performance Issues - LED
  • Compatibility - LED
  • Lutron Hi-Performance LED Driver - LED
  • General Discussion - Quantum
  • Troubleshooting - Quantum
  • Design Assistance - Quantum
  • Programming - Quantum
  • 3rd-party Integration - Quantum
  • Best Practices - Quantum
  • General Discussion - Vive
  • Troubleshooting - Vive
  • Design Assistance - Vive
  • Programming - Vive
  • 3rd-party Integration - Vive
  • Best Practices - Vive
  • General Discussion - Standalone ETP
  • Programming - Standalone ETP
  • Troubleshooting - Standalone ETP
  • Design Assistance - Standalone ETP
  • 3rd Party Integration - Standalone ETP
  • Best Practices - Standalone ETP
  • General Discussion - General Commercial
  • Troubleshooting - General Commercial
  • Design Assistance - General Commercial
  • Programming - General Commercial
  • 3rd Party Integration - General Commercial
  • Best Practices - General Commercial
  • General Discussion - Controls
  • Troubleshooting - Controls
  • Design Assistance - Controls
  • Programming - Controls
  • 3rd-party Integration - Controls
  • Best Practices - Controls
  • General Discussion - HWQS
  • Troubleshooting - HWQS
  • Design Assistance - HWQS
  • Programming - HWQS
  • Best Practices - HWQS
  • General Discussion - Legacy HW
  • Troubleshooting - Legacy HW
  • Design Assistance - Legacy HW
  • Programming - Legacy HW
  • 3rd-party Integration - Legacy HW
  • Best Practices - Legacy HW
  • General Discussion - Legacy RA
  • Troubleshooting - Legacy RA
  • Programming - Legacy RA
  • 3rd-party Integration - Legacy RA
  • Best Practices - Legacy RA
  • General Discussion - Legacy QED
  • Troubleshooting - Legacy QED
  • Programming - Legacy QED
  • 3rd Party Integration - Legacy QED
  • Best Practices - Legacy QED
  • General Discussion - Legacy Other
  • Troubleshooting - Legacy Other
  • Programming - Legacy Other
  • 3rd Party Integration - Legacy Other
  • Best Practices - Legacy Other

Similar Threads

Controlling low voltage hunter douglas shades with homeworks qs wired keypad, somfy shades and hwqs, controlling homeworks qs using homeworks illumination, controlling qs wireless shades thru a qsm in a homeworks system, controlling lie voltage shades, posting permissions.

  • You may not post new threads
  • You may not post replies
  • You may not post attachments
  • You may not edit your posts
  • BB code is On
  • Smilies are On
  • [IMG] code is On
  • [VIDEO] code is Off
  • HTML code is Off

Forum Rules

  • Lutron Support Community

This website may contain user-submitted content and is for informational use only. Lutron disclaims any and all liability for the accuracy and correctness of content and conduct of any third parties in connection with or related to your use of the site. Please see the Terms of Use for more information.

Privacy Policy

(c) 2014 Lutron Electronics Co., Inc.

IMAGES

  1. Lutron Blinds and Homeworks QS

    lutron homeworks shades

  2. HomeWorks Home Automation System

    lutron homeworks shades

  3. Lutron HomeWorks

    lutron homeworks shades

  4. Lutron HomeWorks

    lutron homeworks shades

  5. Lutron Shade Integration

    lutron homeworks shades

  6. HomeWorks Home Automation System

    lutron homeworks shades

VIDEO

  1. Lutron Programmed Shades on Frosty Windows

  2. The Connected Lutron Hospitality Solution

  3. For Sale

  4. Lutron Keypad with TruFig system

  5. Lutron luxury brand video

  6. SMART AV

COMMENTS

  1. HomeWorks Home Automation System

    HomeWorks. For the most uncompromising home integration projects. Equip yourself and your team of technology craftspeople with the ultimate in design freedom, innovative technology, and reliable quality. Push against the limits of what's possible with the Lutron HomeWorks home automation system. For Specifiers. Find a Rep.

  2. Lutron HomeWorks System Overview

    When you choose Lutron, you can trust that your system, with its powerful controls, intelligent blinds, and beautiful light, will work as it's supposed to, every time. Because we have the highest confidence in the quality of our products, HomeWorks is backed by an 8-year warranty. Our solutions are also backed by industry-best 24/7 technical ...

  3. PDF HomeWorks Consumer Brochure

    a system that can adapt to your needs and tastes over time. HomeWorks offers upgrades that keep your system current and ensure that it will continue to deliver the one-of-a- kind experiences you expect in your home. Enhanced features include: advanced dimming technology. voice and audio control. more keypad styles.

  4. Lutron Palladiom Shading System Overview

    Palladiom Shading System. The Palladiom Shading System redefines the beauty of daylight control. Available as a wired or wire-free, battery-operated system these shades look beautiful from every angle, and are designed to be installed without a fascia, pocket, or recess in exposed applications. With groundbreaking technology and whisper-quiet ...

  5. Palladiom Wire-Free Roller Shades

    Shading that elevates the beauty of home. Enhance your space with a shading solution that showcases what's beyond the window pane. Occupying no more than 3 1/4" of vertical space, each Palladiom Wire-Free shade can cover a 12 x 12 foot window — highlighting expansive views while delivering daylight control at scale.

  6. PDF Upgrading Existing Systems to HomeWorks QS

    The existing Lutron system contains window shades. What must be done to use shades in HomeWorks QS? HomeWorks QS is typically paired with QS shades and drives. If you have QED roller shades, you can replace the shade drive with a QS drive and re-use the fabric and mounting hardware. The existing wire can be re-used with QS shades.

  7. Lutron HomeWorks System App & Integration

    Insulating Honeycomb Shades represent an evolution in Lutron window treatment operation, as they are the first wire-free, battery-powered shading solution. ... 
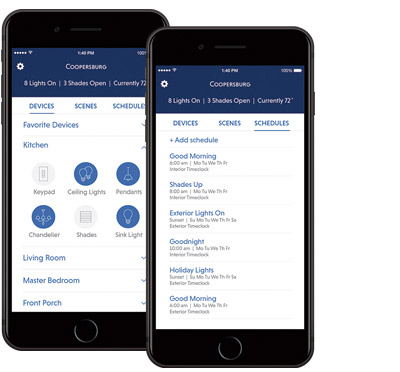
HomeWorks with Lutron App. The QSX processor for HomeWorks creates a link between your HomeWorks system and the cloud, enabling control, integration, and monitoring of a HomeWorks system ...

  8. PDF HomeWorks QS

    Lutron In 1961, Joel Spira gave light extraordinary shade with the innovation of the solid-state dimmer. As the switch gave way to the control, we were suddenly bringing light "up" / "down". Creating the right mood became as important as providing illumination. And so, good lighting evolved into being as

  9. Lutron Sivoia QS Roller Shades

    roller 20 is the smallest addition to the roller shade product line, measuring only 1.25 inches in diameter and 18.5 inches in length. The roller 20 ultra-slim profile offers the ideal solution for inside mounting within most residential window frames. Size. Tube size: 1.25 in. diameter. Pocket size: 3.5 in. w x 3.5 in. h.

  10. Automated Shading Systems

    HomeWorks Commercial Systems Toggle submenu. Commercial Lighting Overview Athena Vive Quantum myRoom XC Code Smart Guestroom System ... Lutron shades promote patient comfort by maximizing connection to natural light and delivering clear views for patients. Learn More

  11. Programming a Lutron Sivoia QS or Palladiom Wireless Shade to a Remote

    A standalone application refers to when Caseta, RA2 Select, RadioRA, or HomeWorks are not being used. Step 1: Confirm that you have a Lutron Sivoia QS or Palladiom Wireless shade by identifying the button style shown below. The Sivoia QS and Palladiom drives have 4 buttons separated in the middle by an LED Indicator Light.

  12. PDF Interfacing HomeWorks Illumination with QS Wireless Shades Rev A

    1 Lutron Technical Support 1.800.523.9466 Revision A October 2011 Interfacing HomeWorks ® Illumination with Sivoia ® QS Wireless Shades (including Cellular shades) Overview Lutron HomeWorks Illumination systems are fully compatible with and should be used with Sivoia QED shades. In some instances, a customer may have Sivoia QS wireless

  13. PDF Wiring and Power Guidelines

    The Q96 Shade Interface has two terminal block connections: one for communication to the HomeWorks QS processor (H48/Q96 link) and another for communication to the QED shades (Sivoia QED communication link). Each Q96 Shade Interface allows the HomeWorks processor to provide control of up to 96 QED shades on the Sivoia QED communication link.

  14. PDF How to Setup and Program QED shades in HomeWorks version 5

    This represents one EDU or one lighting zone. Figure 1 Lighting Mode - Add QED zones. Panel Screen - The HWI-Q96 needs to be added to the Panel Assignment screen. The HWI-Q96 can be placed inside of the low voltage enclosures. Figure 2 Panel Screen - Add the HWI-Q96 Address Assignment - First, assign the HWI-Q96 to an address on the H48/Q96 link.

  15. Automated Shades & Custom Window Treatments

    Dining Room Shades. Protect millwork and textiles. Shades can filter over 99% of harmful UV rays to preserve an interior's colors and materials. Image Gallery. Motorized shades are like a dimmer for the sun. Weave whisper-quiet privacy, UV protection, and f premium textiles into the home light control system.

  16. Lutron Palladiom Shading System Overview

    1/1. The Palladiom Shading System redefines the beauty of daylight control. Available as a wired or wire-free, battery-operated system these shades look beautiful from every angle, and are designed to be installed without a fascia, pocket, or recess in exposed applications. The Palladiom Shading System redefines the beauty of daylight control.

  17. Pair and Configure a Lutron System with a Crestron Home® System

    Lutron HomeWorks QS, HomeWorks QSX, RadioRA 2, RadioRA 3, and RA2 Select systems can be integrated into a Crestron Home system to enable control of Lutron lights, shades, and fans. The Lutron devices can be controlled from a user interface device such as a Crestron touch screen, TSR-310 handheld remote, iOS® device, and Android™ device.

  18. Radio Window Daylight Sensor

    Features. Battery-powered; wire-free. Available in window or mullion mount. Controls a single shade, a group of shades, or an entire façade. Compatible with HomeWorks. Communicates via Lutron Clear Connect RF technology. mullion-mount sensors available in white, black, bronze, and gray finishes; window-mount sensor available in white only.

  19. PDF Interfacing HomeWorks Illumination with Sivoia QS Shades and Venetian

    1 Lutron Technical Support 1.800.523.9466 Revision B March 2011 Interfacing HomeWorks® Illumination with Sivoia® QS Shades and Venetian Blinds Overview Lutron HomeWorks Illumination systems are fully compatible with and should be used with Sivoia QED shades. In some instances, a customer may have Sivoia QS shades or Venetian blinds installed and would like to have control of the shades or ...

  20. How to Set Limits on Sivioa or Palladiom Shades

    A standalone application refers to when Caseta, RA2 Select, RadioRA, or HomeWorks are not being used. The open and close limits determine the most open and the most closed points of travel for a window treatment. For a QS Wired, QS Wireless, or Palladiom shade, blind or drapery track, these limits can be set using the buttons on the drive itself.

  21. Lutron Luxury

    The Lutron Luxury Experience App brings the showroom to your iPad. Guide clients on an immersive, virtual journey where they can interact with Lutron products—and visualize designs in their home. Available now for iPadOS 16.4 or later. Download Now. Discover the latest residential projects, design inspiration, and educational resources.

  22. Design & Configuration Software

    The RadioRA 2 software download is a single file that includes the Designer software, the Essentials software, and can be upgraded to the Inclusive software. Use of the software requires a myLutron account. By default, users will have access to the Designer mode of the software. The Designer software is intended to help specify RadioRA 2 jobs.

  23. Best practice for controlling Somfy shades in Homeworks

    QS/QSX to Somfy using contact closures is easiest... if there are not a lot of motors becasue, one UTSI RF contact box requires a dry set for open, close, stop. Example: To control 3 zones of motors 3 URTSIs and 9 Lutron dry contacts are required. So, if a lot of zones then a DigiOne SP is the answer. The trick is in the connections and Digi ...

  24. Athena

    Athena. An uncompromising solution. The Athena lighting control system empowers architects, lighting designers, electrical engineers, and facility managers with a native network of lighting, lighting controls, shades, and cloud-connected software that deliver exceptional experiences and building management. Product Specs.

  25. Homeworks QS controlling Somfy Shades

    Here is the answer. QS/QSX to Somfy using contact closures is easiest... if there are not a lot of motors becasue, one UTSI RF contact box requires a dry set for open, close, stop. Example: To control 3 zones of motors 3 URTSIs and 9 Lutron dry contacts are required. So, if a lot of zones then a DigiOne SP is the answer.