How-To Geek
How to use a live camera feed in microsoft powerpoint.
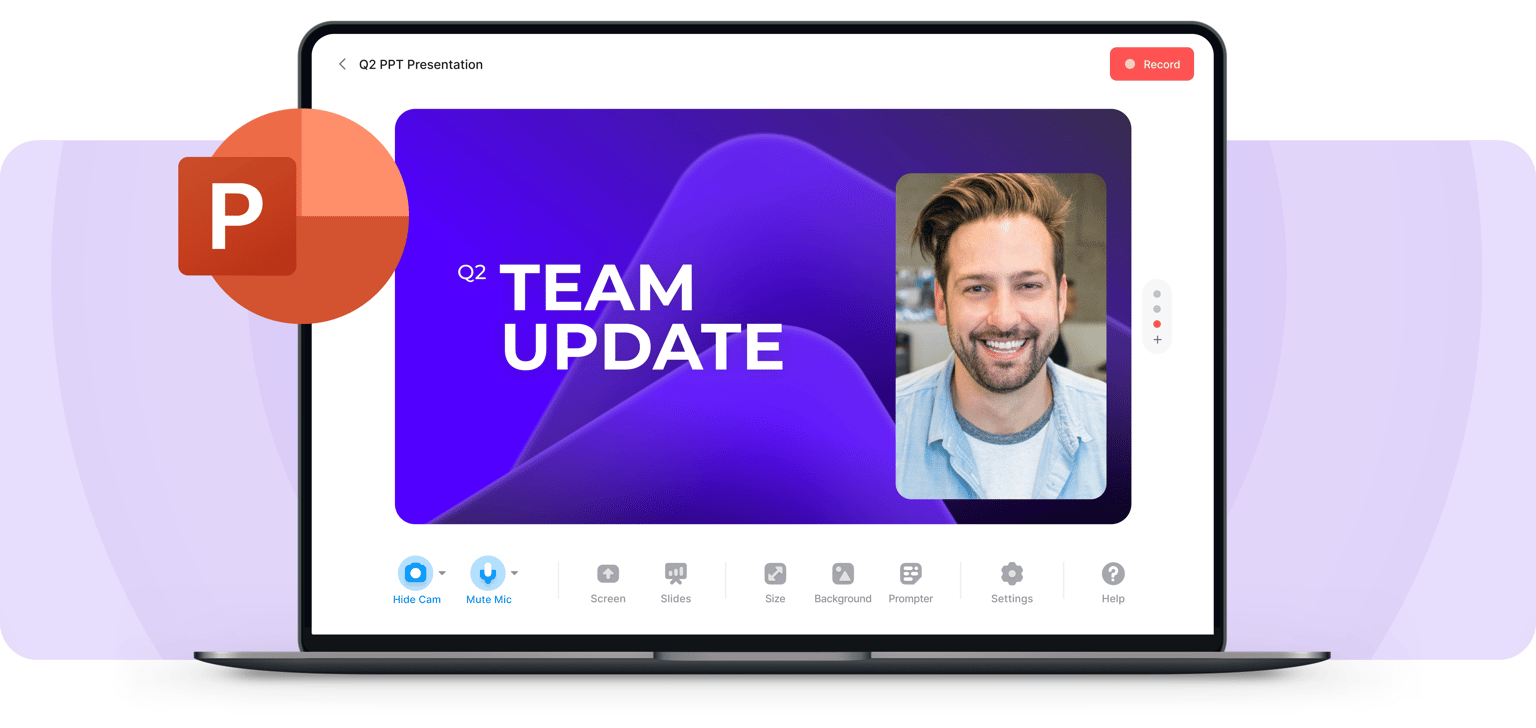
Be the star of your presentation and give it that personal touch.

Quick Links
Requirements for the cameo feature, insert the cameo object on a slide, customize the cameo object, control the camera while presenting.
Do you want to be visible on-screen while presenting your slideshow? If you've got a webcam handy, you can put yourself on every slide in your Microsoft PowerPoint presentation using the Cameo feature.
You can place the camera feed anywhere on your slide, size it to your liking, apply a style, add an effect, and arrange it with other items on your slide.
As the president of your company, leader of a charitable organization, or developer of a new product, this is a great way to bring a personal touch to your presentation. Rather than just hearing your voice using narration , your audience can see your face as well.
As of July 2022, the PowerPoint Cameo feature is available to Office Insiders and rolling out to Microsoft 365 subscribers on Windows and Mac in the coming months.
To use this feature, you must grant permission for PowerPoint to use the camera on your device.
On Windows, open your Settings from the Start menu and select "Privacy." On the left, choose "Camera." On the right, turn on the toggles for Allow Apps to Access Your Camera and Allow Desktop Apps to Access Your Camera.
On Mac, open the System Preferences from your Dock or the Apple icon in your menu bar and select "Security & Privacy." Open the Privacy tab and on the left, choose "Camera." On the right, check the box for Microsoft PowerPoint.
You can place the Cameo element on one slide or all. If you use it on multiple slides, the feed continues seamlessly through each slide in the presentation.
Choose a slide, go to the Insert tab, and select "Cameo" in the Camera section of the ribbon.
You'll see the Cameo object appear on your slide.
To choose the camera you want to use, if you have more than one, select the object and go to the Camera tab that appears. Click the Preview (Camera Preview on Mac) drop-down arrow on the left side of the ribbon and pick the camera you want to use.
Currently, virtual cameras are not supported for the feature.
You can then drag to move it anywhere you like and drag a corner or edge to resize it.
To see a preview of the Cameo, either click the camera icon inside the object or the Preview (Camera Preview on Mac) button on the Camera tab.
Like images and videos you insert , you can customize the Cameo object too. Give it a new style, add a border, or apply an effect.
Select the Cameo object and head to the Camera tab that appears. On the left, use the Camera Styles box to pick a shape with an effect like shadow or a frame.
To the right of the Camera Styles, you can also use the Camera Shape, Camera Border, and Camera Effects drop-down menus to select different options.
You can use the Design Ideas on the Home tab for options on how to lay out the slides using Cameo.
To arrange the Cameo with other slide elements, use the tools in the Arrange section. You can bring the Cameo forward or send it behind other objects , align it to the left, right, or center, or rotate it. On the far right, you can use the crop and size options.
You can begin your presentation as you normally would by picking an option in the Start Slide Show section of the ribbon on the Slide Show tab.
During the slideshow, use the Toggle Camera icon to turn the camera off and on.
The Cameo feature in PowerPoint lets you add a live camera feed for a completely personalized presentation. Are you going to give it a try?
For more, learn how to set the preview image for a video or how to trim a video right in PowerPoint .
How to Record PowerPoint Presentation with Webcam and Mic

Are you looking for a way to video record yourself presenting PowerPoint Slides? Well, no worry, in this guide, you will find step-by-step instructions.
After the pandemic, work from home has increased. In addition, it also increased the need of recording PowerPoint presentations with audio and video. If you’re using Office 2021 or Microsoft 365, then you will get a built-in option to record slideshows. However, if you’re using Microsoft 365 online version or Google Slides, then you will not get such an option. Although, still you can manage to record your screen with a webcam and audio. Yes, all these processes seem complicated, but actually quite easy.
Video Record Yourself Presenting a Powerpoint
Are you using the latest version of Microsoft Office 2021? Then you don’t need to use any third-party software to record PowerPoint presentations. Because PowerPoint comes with an inbuilt option to Record Slideshow. It also allows you to select your webcam and microphone to record. So that, you can record yourself presenting a PowerPoint presentation.
1. First, open Windows Search and search for PowerPoint App. Do open PowerPoint App.

2. Click on Blank Presentation.

3. New Presentation Project will get open, now use slides and create a new PowerPoint Presentation.
4. After that, from the PowerPoint menu, click on Record.
5. Record menu will get open. Click on Record > From Current Slide.

6. PowerPoint Recording screen will get open. Now, from the upper right corner of the screen. Click on the speaker settings icon. Now, do select your Webcam and Microphone.

7. Once you see yourself in the webcam, click on the Record button. And, recording will get started. Do record your PowerPoint presentation.

8. Once the Recording gets completed, click on Stop. Slideshow will get ended, press the Esc key to exit from SlideShow.
9. Now, to save the video, click on “Export to Video”.

10. Export Screen will appear. Select Video quality, and click on Create Video.

11. Save as window will appear, select the videos folder, and click on Save.

12. Now, open File Explorer, and you will find the PowerPoint Recorded File.

So, that’s how you can screen recording in PPT.
Record Google Slides Presentation with Video and Audio
If you’re someone who prefers using Google Slides over Microsoft PowerPoint. Then, you might be trying to figure out – how to record a slideshow with Webcam. Yes, there are some Screen & Audio recorder extensions available for PowerPoint. But, these extensions require so many permission and aren’t completely free. That’s why, it would be better if you use OBS Studio.
OBS Studio is a completely free and open-source screen recording and streaming app. It is available for all major platforms like Windows, macOS, Linux, and BSD. With OBS Studio, you can record Google Slides with a webcam and microphone. Even, you can record PowerPoint presentations as well using this method.
Create a Slide Show on Google Slides
First, do open your favorite web browser, and open Google Slides Website . And, do Sign In using your Google Account.
After that, Click on Blank to open a new Google Slides project. That’s it, now create slides for your presentation.
Download and Install OBS Studio
1. Do download OBS Studio from its official website.
2. Once, the OBS Studio setup gets downloaded. Do right-click on it, and click on “Run as administrator”.

UAC Window might appear, click on Yes.
3. OBS Studio Setup Window will get open, do install it on your Computer.

4. Once, OBS Studio gets installed. Keep the “Launch OBS Studio” option selected, and click on Finish.
5. OBS Studio will open with the “Auto-Configuration Wizard” window. Select “Optimize just for recording, I will not be streaming”. Click on Next.

6. Next, the Video Settings window will get open, do select the base resolution and FPS as per your screen. Click on Next.

7. OBS Studio will now show you all configured settings, click on “Apply Settings”.

Setup OBS Studio and Record Google Slideshow
1. In the Sources section, click on the “+” icon, and after that click on “Window Capture”.

Note: If you want, you can select the “Display Capture” option to record the entire desktop. But since here we want to capture Google Slideshow only. That’s why, I am using the “Window Capture” option.
2. Create/Select Source window will appear, click on Ok.

3. Properties for the “Window Capture” screen will appear. Do select “Chrome” in the Window option. And, keep other settings unchanged, Click on OK.

How to Enable FPS Counter in GTA 5 PC Game

4. Now, do again click on the + icon in sources, and you will get the “Video Capture Device” option. Click on it.

5. Create/Select Source window will appear, click on ok.

6. Properties for the “Video Capture Device” screen will appear. Do select your webcam and Click on ok.

Note: If you don’t have a webcam then you can use your Android Phone as a Webcam . Even, if you’re an iOS user, then you can use iPhone as a Webcam .
7. You will now see a webcam window over your Google Slides window. Do set your webcam as you want in the recording. You can drag and resize the “video capture device” window.

8. Now, before we start recording we have to set up Microphone Settings.
9. In Audio Mixer you will find Mic/Aux settings. Click on the three-dots icon and click on properties. (You can also mute desktop audio if you like, by clicking on the speaker icon.)

10. Mic Properties window will appear. Do select your microphone and click on ok.

11. That’s it, click on Start Recording Button.

12. Recording is now started. Do open Google Slides Window. And, do press Ctrl + F5 to start the slideshow. Or, simply click on the Slideshow option. (You just have to click anywhere on the screen to move to the next slide.)

13. Now, do complete your presentation. Press the Esc key to exit from the full screen. Do open OBS Studio and click on “Stop Recording”.

14. That’s it, you have successfully recorded yourself doing a Presentation in Google Slides. Do open File Explorer > Video. And, here you will find the recording of the presentation with the webcam.
15. Since we have used Window Capture, so you will only see the Google Slides window. However, if you’ve captured the screen, then you can use CapCut or Clipchamp Video Editors.
- Screen Recording RecExperts For Windows Screen recorder for PC RecExperts For Mac Screen recorder for macOS Online Screen Recorder Record screen online free ScreenShot Take Screenshot on PC
- Buy Now Buy Now
- Resources Screen Recorder Windows 10 Record Zoom Meeting Record Internal Audio Mac Record Gameplay on PC Video Recording Software
- Support Support Center Guides, License, Contact Chat Support Chat with a Technician Pre-Sales Inquiry Chat with a Sales Rep
- Free Download For Windows For macOS
Best Way to Record PowerPoint with Webcam (Audio)
Irrespective of their professions, people often ask how to record a PowerPoint presentation and your face. So you can walk into this comprehensive guide that offers the four best and most efficient methods to record PowerPoint with Webcam, along with their tutorials.
Trustpilot Rating 4.7
Don’t forget to share this post!
Page Table of Contents
Updated on Jan 29, 2024
It is a fact that a PowerPoint presentation is the most effective way to convey your message. Whether you are a student, professional, entrepreneur, or an established businessman, you will always need to make or record presentations for one thing or the other.
Sometimes, it is required to record PowerPoint with webcam to make it more interactive. Even you can record the real-time presentation video to keep it available on demand. Though it is not difficult to record the presentation videos with an audio or facial explanation, knowing the proper procedure is a must. Let's explore this write-up that introduces you to the top video recording software to record PowerPoint and your face, thus resulting in the best presentation video.
Record PowerPoint with Webcam (Audio) using RecExperts
EaseUS RecExperts is a comprehensive software that aids you in recording videos, with or without audio. You can effortlessly choose the screen size and the audio or video recording sources. It does not only let you capture your face by using a webcam and selecting the desired camera but also the system or microphone sound. It also supports a recording screen with audio on Windows 11/10/8/7.
Furthermore, changing the output format, quality, frame rate, bit rate, and sampling rate is all in your control. When recording the webcam, you can change your real background into a virtual one, such as a classroom, studio, scenery, or blur, as this screen recorder has an AI background removal feature. In addition, you can choose to upload the picture as the virtual background.
- Support formats like MKV, WMA, MOV, etc.
- Work as an advanced media player
- Easily extract audio from video files
- Offer the task scheduler function
- Let you capture the video into a GIF
Let's follow the procedural steps to record PowerPoint with a webcam:
Step 1. Launch EaseUS RecExperts on your computer. Choose a recording mode from "Full Screen" or "Region" . To record a part of the screen, select the recording area manually.

Step 2. After selecting the recording mode, click on the camera sign on the interface. This will let the tool record your screen and the webcam at the same time.

Step 3. You can also change the background with the AI Recognition ot green screen feature. Classroom, blur, studio, or your local images are supported. Just click "Webcam" > "Settings" > "Remove Background" to download and use these modules. Then, click the "REC" button to start recording.

Step 4. After recording, the recording list window will open. Here you can view, split, delete, manage your recordings easily.

Read also: How to record PowerPoint with audio
Capture Webcam and PowerPoint using the PPT Recording Function
Since Microsoft PowerPoint offers the in-built recording function, you can use it to record a presentation with webcam. It lets you use narration and choose the camera input. You can even customize the mouse pointer to set the desired color scheme.
A fantastic feature offered by this program is the Rehearse with Coach option to get feedback. In addition, the output file is smaller in size and can be exported in a wide range of formats.
Here is the step-by-step guide to recording PowerPoint with Webcam:
Step 1. The first step involves the opening of the updated version of PowerPoint. Now, expand the "Slide Show" tab and then "Record Slide Show." You have to select from the two choices, i.e., "Start Recording from Current Slide" and "Start Recording from Beginning."
Step 2. Let's suppose you select the second option. But if you want to record the specific slide, open that slide. In the case of the recording screen, open the "Insert" category and choose "Screen Recording." Next, press the "Record" button and speak into the microphone.
Step 3 . Also, expand the three-bar menu to click "Webcam" under the "Camera" and sound source under the "Microphone" section. Finally, you can hit the "Pause," "Replay," or "Stop" button to control the recording. You are all done!

Record PowerPoint Presentation with Face using QuickTime Player
QuickTime Player is a default media manager for Mac users. You can quickly make it work as a tool to record a PowerPoint presentation and Face.
Besides changing screen size, editing the recordings later and trimming the unnecessary video parts is possible. Last but not least, you can export the file to the device or share it directly on other apps.
Let's move forward toward the steps to record PowerPoint with webcam:
Step 1. Firstly, open the file and QuickTime Player on your system. Now, click "New Movie Recording." You can also select "New Screen Recording." You are open to resizing your recording screen.
Step 2. After that, press "View" to choose "Float on Top." It will keep your camera on top of every application. Secondly, move the camera Window to wherever you want.
Step 3. Lastly, click the "Red" recording button to record your screen and face. Later you can stop the recording with the Command-Control Esc keys.

Record Slideshow PowerPoint with Camera using Panapto
Panapto Express is a free and advanced video and screen recorder that helps you to record PowerPoint slides and your face via a built-in microphone and Webcam. Also, you can add multiple screens and multiple video sources. What makes it unique is its offering to enjoy up to 4K UHD recordings.
Plus, you can change the video stream arrangement from side-by-side to picture-in-picture. It provides a Smart camera to control your position in the recording frame. You are even allowed to blur or replace the background easily.
Here is a tutorial on how to record a slideshow PowerPoint with a Camera:
Step 1. You need to open Panopto Express in your browser. Now, you can either use the built-in recording sources or attach the Webcam and microphone to the system, which this tool will automatically detect.
Step 2. Next, open the PowerPoint slides, click on the "Slide Show" tab, and put it in this mode. Since Panopto offers two options: recording slides with Screen Recording or within PowerPoint. Click the "Screen Capture" icon to open the popup window to choose one and press the "Share" button.
Step 3. In the final step, hit the large red "Recording" tab and press it again to stop recording when you are done.

Undoubtedly, a good presentation is crucial for effective communication. Since PowerPoint offers basic recording features, you must use advanced tools to help record PowerPoint presentations with Webcam.
So after exploring the above article, you can choose the tool according to your requirements. The step-by-step tutorials for each recommendation are enough to carry out your PowerPoint presentation recording.
In addition, don't forget to try EaseUS RecExperts to get the best and fast results. Besides recording, it also offers post-editing, playing, and multiple other features.
FAQs About Recording PowerPoint with Webcam
1. Can you video record yourself on PowerPoint?
PowerPoint comes with an in-built video recorder, so it is possible to record your presentation with narration, a camera input, or only your screen. You will need Microsoft Office, Webcam, and a microphone if the Webcam doesn't offer it.
2. How do I record a PowerPoint 2016 with a webcam?
To record a PowerPoint 2016 with a Webcam, you need to expand the Recording tab and click on the Record Slide Show. Now, choose Record from Beginning from the drop-down menu, which will open the dashboard to offer two options. First is Screen Recording, where you can record the screen with audio. While the other is the Record Slide Show, with which it is possible to record Webcam audio/video over the presentation. All done!
3. Why my PowerPoint can't record my face?
The main reason behind not getting your face recorded is to forget about enabling the recording tab in PowerPoint. For this purpose, you need to click File > Options and then Customize Ribbon. Now, checkmark the Recording tab under the primary tabs from the right side. That's all!
EaseUS RecExperts

One-click to capture anything on screen!
No Time Limit, No watermark
Melissa Lee
Related Posts

(100% Working) Get EaseUS RecExperts License Key Free

[2024 Guide] How to Edit a Webex Recording Easily

(Top 3 Method) How to Record Only One Tab in Chrome

How to Screenshot on 60 Keyboard Easily [Top 4 Ways]
Success, thanks for submitting!
- Refund Policy
- Terms & Conditions
- Do Not Sell
Copyright © 2004 - 2023 EaseUS. ALL RIGHTS RESERVED.
How to Record a PowerPoint Presentation with Narration
Can be helpful in creating a dramatic narrative
Microsoft PowerPoint has a built-in recording tool that allows you to narrate your presentations using recorded audio. You can export and share recorded presentations as video files.
This tutorial covers everything about recording PowerPoint presentations on Windows and Mac computers.

Record PowerPoint Presentation with Narration
Open the PowerPoint file/presentation you want to record and follow the steps below.
Record PowerPoint Presentation on Windows
- Select the slide you want to start recording from on the slide thumbnail pane.

- Head to the Record tab on the ribbon and select the Record button to start recording from the current/selected slide.

To record from the first slide, select the down-facing arrow icon below the Record button and select From Beginning .

You can also record a presentation from the Slide Show tab. Select Slide Show on the ribbon and select Record , From Current Slide , or From Beginning .

That’ll open PowerPoint’s presentation recorder in a fullscreen window.
- Select the Record icon and start speaking after the three seconds countdown.

PowerPoint records the presentation window and captures your voice and webcam feed as you navigate the slides. Select the left-facing and right-facing arrows to move to the previous and next slides in the presentation.
Record PowerPoint Presentation in macOS
- Open the Slide Show tab and select Record Slide Show .

- Select the Record button on the toolbar to start recording your narration.

Use your keyboard arrow keys to move back and forth between slides. Press N or Space Bar to move to the next slide or animation in the presentation. Press P or Backspace to return to the previous slide or animation.
Select Tips in the top-left corner for more keyboard shortcuts and other presentation tips .

Note: The narration tool doesn’t record slide transitions. When moving between slides, wait for the destination slide to appear on the screen before speaking.
PowerPoint Recorder Control/Settings
You’ll find a handful of controls and options on the recording tool. We’ll show you how to use these controls to include voiceovers or audio recordings in your presentation.

Using Presentation Pointer Tools
PowerPoint provides several tools to mark up your slides when narrating your presentation. There’s a pen tool, eraser, laser pointer, and highlighter.
With the Pen tool, you can draw on slides during narration/recording. Press Ctrl + P (Windows) or Command + P (Mac) to use the pen tool. You can also select the Pen icon to convert the pointer to a pen.

The Laser pointer tool converts your cursor to an onscreen laser. Use the laser pointer to draw attention to something on a slide/presentation.
Press Ctrl + L (Windows) or Command + L (Mac) to use the laser pointer. There’s also a Laser pointer icon on the toolbar.

Pressing Ctrl + I (or selecting the Highlighter tool ) converts your cursor to a highlighter.

Use the Eraser tool to remove inks and highlight from slides. Select the Eraser icon or press Ctrl + E and select the ink to erase.

On macOS, select the Erase Pen icon (or press E ) to erase all drawings and highlights on the slide.

You can change the pointer tools ink from the color selection boxes. However, one major limitation is that you can’t change the size of these pointer tools.
Pause and Resume Your Recording
In Windows, press I on your keyboard or select the Pause button in the top-left corner to pause your recording.

Press I again or select the Record icon to resume the recording.

If you use a Mac, select the Pause icon in the top toolbar to pause the recording.

Unmute or Mute Microphone
Check that your microphone is unmuted before recording. Select the microphone icon in the bottom-right corner to mute or unmute your mic.

PowerPoint for Windows allows you to mute and unmute your microphone in real time while recording video/audio narrations. The macOS version of PowerPoint only lets you configure your camera and microphone settings before recording.
Switch Microphone or Camera
Want to record your presentation with an external microphone or camera? Press Ctrl + M or select the audio/camera settings icon in the top-right corner and choose your preferred microphone/camera.

In macOS, select the microphone icon to mute or unmute your microphone. Select the arrow-down icon next to the microphone or camcorder icons to switch input devices.

Enable and Disable Camera
The recorder displays your camera or webcam feed in the bottom-right corner of the presentation slides.
Select the camcorder icon to remove your webcam feed from the recording. Select the icon again to display your webcam feed in the presentation.

You can also use the Ctrl + K keyboard shortcut on Windows computers to enable or disable your camera.
On Mac computers, you’ll find the video control icon on the top toolbar.

Note: The recording tool greys out the camcorder icon if your microphone is turned off.
Enable or Disable Camera Preview
PowerPoint allows you to disable the camera preview without turning off your camera or webcam.
Press Ctrl + J (Windows) or select the Camera Preview icon in the bottom-right corner to disable or enable the camera preview.

End a Recording
Press S on your Windows keyboard or select the Stop icon to end the recording.

Replay or Preview Your Recording
When you end a narration, press V on your keyboard or select Replay to preview or watch the recording.

The recorded narration will include all pen inks, highlights, and laser pointer gestures made during the presentation.
You can also preview/replay the narration outside the recording tool. Open the Slide Show tab and choose to watch the playback From Beginning or From Current Slide .

PowerPoint allows you to preview the playback on individual slides. A speaker/audio icon appears in the bottom-right of PowerPoint slides with narrations.
Choose the slide you want to preview, hover your cursor on the speaker icon in the bottom-right corner, and select Play .

Delete Current Narration/Recording
Did you spot an error when previewing your presentation? Want to delete the current narration and start from scratch?
Select the Clear existing recordings icon and choose whether to Clear Recordings on Current Slide or Clear Recordings on All Slides .

On Mac, select the Bin icon to delete the entire narration/recording.

Close the Narration Tool
Select the X icon on the title bar to close the presentation narration tool and return to Powerpoint.

Select End Show in the top-left corner to close the recording tool on a Mac computer.

Delete Narrations from Slides
Want to delete the narration or timing on an individual slide or the entire presentation? Select the slide with the narration you want to delete and follow the steps below.
- Open the Record tab and select the down-facing arrow below the Record icon.
- Select Clear and choose to clear timing or narration on current or all slides.

Export Recorded or Narrated Presentation
You can export a narrated PowerPoint presentation as a video file. The video output includes ink strokes, recorded audio/video, laser pointer gestures, and webcam/camera recording.
- Open the Record tab and select Export to Video .

Alternatively, open the File menu, select Export on the sidebar, and select Create a Video .

- Choose the quality of the video export in the first drop-down box—Ultra HD (4K), Full HD (1080p), HD (720p), Standard (480p).

- Choose Use Recorded Timings and Narrations in the next drop-down box and select Create Video .

- Give the recorded presentation a file name and select Save .

Narrate Your PowerPoint Presentations
The Microsoft PowerPoint web app doesn’t have a recording tool. As a result, you can only record presentations with narrations using PowerPoint for Windows or Mac.
You might meet issues recording a slide show if you use an outdated version of PowerPoint. Also, the recording tool on older versions of PowerPoint has a different interface and lacks some controls. Update PowerPoint and restart your computer if you cannot record a slide show.

Sodiq has written thousands of tutorials, guides, and explainers over the past 4 years to help people solve problems with Android, iOS, Mac, and Windows devices. He also enjoys reviewing consumer tech products (smartphones, smart home devices, accessories, etc.) and binge-watching comedy series in his spare time. Read Sodiq's Full Bio
Read More Posts:

Leave a Reply
Your email address will not be published. Required fields are marked *
- DemoCreator > Easy video recorder and editor for PC & Mac
- DemoAir > Online screen recording tool for everyone
- Effects Store > NEW Creative video effects for DemoCreator
- Presentory > AI-powered presentation maker
- Screen Recorder >
- Webcam Recorder >
- Voice Recorder >
- Game Recorder > HOT
- Video Presentation >
- Screen Drawing >
- Schedule Recorder >
- Video with Virtual Camera >
- Video Editor >
- Cut/Merge Video >
- Resize Video >
- Change Video Speed
- Batch Processing >
- Video Overlay >
- Audio Editing
- Online Screen Recorder >
- Online Voice Recorder >
- Online Webpage Screenshot >
- Screen Recorder for Chrome >
- Online Video Presentation Maker >
- HOT Video Editor > Take your videos to the next level
- NEW DemoCreator > Easily make a visual video presentation
- AI Avatar Video Generator > HOT
- AI Denoise >
- AI Voice Changer >
- AI Teleprompter > HOT
- AI Subtitle Generator >
- AI Speech Enhancer >
- AI Background Remover >
- AI Text to Speech > HOT
- AI Video >
- AI Voice >
- AI News >
- Hot Spot >
- Best AI Avatar Generators >
- AI Audio to Video >
- AI Virtual Friends Apps >
- Best AI Face Generators >
- Online Course >
- PPT Recording >
- Demo Video >
- Game Recording >
- Record on Windows >
- Record on Mac >
- Record on Mobile >
- Game Recording >
- YouTube Videos >
- Creative Effects >
- Audio Editing >
- Video Conference >
- Zoom Recording >
- Remote Work >
- Demo Video Tips >
- Online Class > NEW
- Teacher Skills >
- Elearning Tips >
- Lectures Recording >
- HOT DemoCreator Camp Take your videos to the next level

- User Guide >
- Video Tutorial >
- Tech Specs >
- What's New >
- Download Buy Now Download Buy Now
Best Presentation Video Recording Software
- 1. Create annotated screen recordings.
- 2. Record customized screen & audio and edit directly.
- 3. Capture webcam video and export it to social media platforms.

How to Record PowerPoint Presentations with Webcam

Presentations are an effective means of conveying information. You always need to make presentations whether you are a student, a businessman, a professional, or an entrepreneur. Thus, you may need to record PowerPoint with a webcam to make your audience understand better.
Creating a presentation video with a facial explanation is not a difficult task today. In this article, we will introduce 4 methods to help you make a video of a presentation with a webcam on it. Follow the guide below and choose the suitable one for your situation.
Way 1: Record PowerPoint with A Camera
If you want to know how to make a PowerPoint presentation with a webcam, then keep on reading. Using a webcam is a simple method to record yourself talking with no screen etc. All you will need is:
- A microphone (a microphone may be built into your webcam)
There are many software and tools available that help us to record our PowerPoint presentations with webcams. Such as the DemoCreator PPT video maker , or the built-in recording function in PowerPoint.
Way 2: Use PPT Internal Recording Function
There is an in-built recorder in PowerPoint that helps us to record our presentation. You can also add your narrations to your PowerPoint presentation. For this, you need Microsoft PowerPoints, a Microphone, and a Webcam. Follow the following steps to record your presentation with a built-in recorder.
- Go to ‘Record Slideshow’ in the ‘Slideshow Tab’.
- If you want to record your screen, then go to the ‘Insert’ tab and select ‘Screen Recording’.
- If you want to add your audio to your presentation, go to ‘microphone’ in the recording option. Adjust the volume slider as needed. Make sure to mute all other sounds as they will be also added to the presentation.
- With the help of your webcam, you can also record camera video. These video clips can be added to your presentation as a Picture-in-Picture clips.

These videos can be exported in video formats as well as saved as PowerPoint presentations.
PowerPoint's built-in recorder feature converts the presentation into a video. It is quite beneficial for new users who don’t have much experience. Furthermore, it has several benefits, like having a smaller-sized output file. There is no requirement for any third-party software to use this feature. The help menu is readily accessible in case any support is required. As this software is ready, therefore, it can be considered student-friendly.
Way 3: Record PowerPoint Presentation with Webcam on Mac
You can also record PowerPoint presentations on Mac . You will learn how to record PowerPoint presentations with a webcam on Mac. Furthermore, you can record your presentation using in-built apps on Mac without installing any other software. QuickTime player is a built-in screen recorder in the macOS . Following are the steps involved in recording your presentation using Mac:

- In the application folder, open the QuickTime application.
- Now select File and go to ‘New Movie Recording’.
- Now click ‘View’. Select ‘Float on Top’ on the top so that your camera application is on top of every other application. Your video may not be able to record you if you do not select this.
- Now resize the camera window. You can move the camera where anywhere on the screen.
- Go to File again. Now select ‘New Screen Recording’.
- This will appear:
Here you can click on the arrow button to change your setting. For example, if you want the full screen or part of your screen. And then you can start recording.
- Click on the red button to start recording.
- Now you are recording your screen and your camera view, i.e. your face. When you have finished your recording, press the keys Command-Control-Esc keys. You can also edit your videos using QuickTime. Go to QuickTime and click Edit. Here you can cut the unwanted parts of your presentation.
Way 4: Use DemoCreator to Create Presentation Videos *
If you don’t want to use the built-in PowerPoint recorder, then you can use Wondershare DemoCreator . It is the best option to be considered for recording PowerPoint presentations. This is because it quickly captures your presentations with narrations.
This software has the easiest methods for Presenters to make a product demo video , lecture tutorial, gameplay video , and more. DemoCreator works with your built-in webcam and mic perfectly. It enables you to capture your screen as well as your webcam simultaneously.
Here, you are also given the option to choose your video resolution and frame rate . It will record the system audio by default. If you don’t want the system audio, you can also disable it. It is compatible with most USB built-in webcam mics, so it is the most convenient to use. You can also mark important recording nodes for additional editing.
The steps to record PowerPoint presentations with DemoCreator are explained below:
Open Wondershare DemoCreator on your PC. Click on the "New Recording" button from the interface.

Click ‘ Screen ’ to choose the capture area. Here you can select between full-screen type recording, target window, or customized recording.

In the ‘Audio’ section, you can choose between system audio and microphone audio. With the ‘Camera’ option, select your preferable ‘Resolution’ and ‘Frame rate. The advanced tab assists you to select the hotkeys.
F10 is used to start/stop recording, whereas F9 is for pause and resume.
When you are done with customizing, open PowerPoint and make it the target recording window. Then click the red circle to start recording.

Wondershare DemoCreator has numerous attributes such as arrows that can help you in explaining. You can convey your information by making drawings and marking the important words/events or audio. It is a wonderful HD video recorder for presentations because it can record you through the webcam and the screen simultaneously.
You can also put your video in the recording so that your students and trainees can learn and understand better. After finishing, it will give you options to make the video even better. There are numerous tools, a changeable cursor, and interesting effects. After editing, you can send it in multiple formats.
By now you must have known how to record a PowerPoint with a webcam. It is fairly simple to use by amateurs. DemoCreator video recorder is a handy tool with a user-friendly interface to video record yourself presenting in PowerPoint with a webcam on Windows and Mac. It gives you the freedom of magnifying your presentations by adding narrations, texts, shapes, audio, and video clips. Thus, tools like DemoCreator are excellent for recording PowerPoint presentations and can intensify your presentation skills undoubtedly.

The Best PowerPoint Presentation Recorder

Turn your PowerPoint Presentations into an MP4 Video
How to Convert PPT to Video Online?
How to Draw on Screen while Recording PowerPoint?
PowerPoint Recorder
Record your PowerPoint presentations online
Powerful Online PowerPoint Recorder
Make your presentations look professional using VEED’s online PowerPoint recorder. It’s fast, easy to use, and gives you access to video editing tools to make your presentation stand out. You can upload your slides or record your screen while you are presenting. Add yourself to the scene by recording your webcam and audio as well.
No need to install software. Open your browser and start recording! Choose from different layouts and customize your video after you record. You can also edit your recording using our professional video editor.
How to Record Your PowerPoint Presentation:
1 upload slides and select a layout.
Select from our list of layouts (you may need to click to ‘Allow’ permission to access your screen, camera, or microphone). You can record just your screen, your webcam, or both at the same time! You can either upload your slides or record while you’re presenting.
2 Start recording
Click the red button to start recording! You'll see a countdown before the recording starts. Don't worry if you mess up. You have unlimited time and unlimited retakes. You can navigate to other pages, and don't worry, you are still recording.
3 Review, edit, and export
You can playback your recording to review it, click ‘Share’ to share with friends and colleagues, or ‘Edit’ to edit your video (perfect for adding text, subtitles, and professional touches to your screen recording)

‘PowerPoint Recorder’ Tutorial

Highly customizable PPT recording software
VEED lets you easily customize your Microsoft PowerPoint presentation recordings. Select from different layouts and backgrounds. You can record your screen, webcam, audio, and upload your PowerPoint slides to present while recording. If you choose to record your entire desktop, you can easily switch the view between your presentation slides and other windows. When you’re finished, edit your video using our free video editor, where you can also add royalty-free music from our Stock Library.
All the things you need in a screen recorder
Our video capture software is packed with features that will help you create professional-looking recordings. When you press record, the countdown timer will appear to prompt you when your recording starts. To make sure that your audio is being picked up, check the little microphone icon on the bottom of your screen. It should be animated to indicate that your audio is being recorded. It only takes a few clicks. It’s the best app to record your Microsoft PowerPoint presentations.
Fast, free, and easy-to-use screen recorder software
Our screen recorder and video editor are free to use and beginner-friendly. However, if you need to record longer videos, you may need to subscribe to our premium plans. Check out our Pricing Page to see which plan suits your needs. It is super easy to use. It only takes a few clicks!
Frequently Asked Questions
Microsoft does allow you to record your presentation as well as your voice or audio. But you might be limited because you can’t switch screens. Use VEED to record your entire desktop and switch between windows.
With VEED, you can record your audio, webcam, screen, and presentation slides all at the same time!
To add yourself or your camera to the recording, select the layout that includes “webcam.” Choose the size and positioning of your camera feed and start recording!
Although there are many screen recorders out there, VEED is your best choice when it comes to recording your PC screen! It’s free and online. No need to install software. Plus you can use our free video editor to enhance your recording even more.
What they say about VEED
Veed is a great piece of browser software with the best team I've ever seen. Veed allows for subtitling, editing, effect/text encoding, and many more advanced features that other editors just can't compete with. The free version is wonderful, but the Pro version is beyond perfect. Keep in mind that this a browser editor we're talking about and the level of quality that Veed allows is stunning and a complete game changer at worst.
I love using VEED as the speech to subtitles transcription is the most accurate I've seen on the market. It has enabled me to edit my videos in just a few minutes and bring my video content to the next level
Laura Haleydt - Brand Marketing Manager, Carlsberg Importers
The Best & Most Easy to Use Simple Video Editing Software! I had tried tons of other online editors on the market and been disappointed. With VEED I haven't experienced any issues with the videos I create on there. It has everything I need in one place such as the progress bar for my 1-minute clips, auto transcriptions for all my video content, and custom fonts for consistency in my visual branding.
Diana B - Social Media Strategist, Self Employed
More than a PowerPoint recorder
VEED is a complete browser-based tool that lets you do so much more than just record and share your Microsoft PowerPoint presentations. You can annotate your videos to make your presentation more informative. Edit your recording to add images, subtitles, and more. It is a professional all-in-one video-creation and editing software that’s great for beginners and pros alike. Create professional-looking videos in just a few clicks. You don’t need any video editing experience. Create stunning videos that you can share on social media in just minutes. Try VEED to create professional PowerPoint recordings today!

Filmora for Mobile
Easy-to-Use Video Editing App

- Video Editor >
- Mac Video Editor >
- Video Editor for iOS >
- Video Editor for Android >
- Video Editor for iPad >
- Video Editor Online >
- Creative Assets >
- Compound Clip NEW
- Screen Recorder >
- Speed Ramping >
- Keyframing >
- Green Screen >
- Auto Beat Sync >
- Audio Visualizer >
- Auto Synchronization >
- Silence Detection >
- Audio Ducking >
- AI Copywriting NEW
- Add Text To Video >
- Text-To-Speech (TTS) >
- Speech-To-Text (STT) >
- Multi-Clip Editing >
- Video Effects >
- Preset Templates >
- AI Portrait >
- Boris FX >
- NewBlue FX >
- AI Copilot Editing >
- AI Text-Based Editing >
- AI Music Generator >
- AI Text-To-Video >
- AI Vocal Remover >
- AI Thumbnail Creator >
- AI Image >
- AI Copywriting >
- AI Smart Cutout >
- AI Smart Masking >
- Meet AI >
- ChatGPT Video >
- AI-Generated Video >
- Metaverse >
- AI Marketing >
- AI Video Editor >
- AI Video Generators >
- AI Music Composers >
- AI Voice Generators >
- AI Music Remixer >
- YouTube Monetization >
- Intro Video >
- Promo Video >
- Explainer Video >
- Slideshow Video >
- Product Video >
- Marketing Video >
- Presentation Video >
- TikTok Video Ads >
Master Class
Creator hub, content hub, marketing calendar, video trends, diy special effects.
- Trendbook >
- Creative Garage >
- Refer A Friend Program >
- Achievement Program >
- Video Events >
- Creator Spotlight >
- Get Certified >
- Best Video Editor Software >
- Screen Recording Tips >
- Audio Editing Tips >
- Video Editing Tips >
- Animation Tips >
Video Tutorial
Version history, customer stories.
- Affiliate >
- Business >
- 🐰 Easter 20% Off
- Download Download Download Pricing Pricing Pricing
- Various AI editing tools to increase your video creation efficiency.
- Offer popular templates and royalty-free creative resources.
- Cross-platform functionality for editing everywhere.
How to Record PowerPoint Presentation with Webcam

PowerPoint presentation is still the most effective way of conveying an idea, a topic, or an agenda digitally. In today's world, meetings and classes are conducted online and PowerPoint presentations are used to show the topic and sub-topics of discussion. Sometimes, you need to record PowerPoint presentation with webcam so that anyone can check it out any time they want. Therefore, if someone misses out on the online sessions, he can check the recorded session.
Besides, you may want to record PowerPoint with webcam and send your recording across to your team members, clients, and even students. In fact, there are many video creators who upload educational and informational videos on video streaming platforms where they record their PPT with webcam. In this article, we will illustrate how to record a PowerPoint presentation with webcam.
Way 1. Record PPT and Webcam with PowerPoint Recording Feature
The easiest way to record webcam with PowerPoint presentation is by using PowerPoint's built-in recording option. Yes, PowerPoint does come with an option to record slide show along with webcam and mic. The video from the webcam will be shown in Picture-in-Picture mode at one corner on top of the PowerPoint presentation. Here are the steps to record PPT with webcam without installing any external software.
Step 1: Open PowerPoint and your presentation file.
Step 2: Go to Slide Show tab and click on Record Slide Show.

Step 3: On the next screen, go to Settings located at the top-right corner. Select webcam and microphone properly.
Step 4: Click on Record button at the top-left corner. You will get three seconds to get started.
Step 5: When you want to stop recording, click on Stop button at the top-left corner.
Step 6: Go to File> Export> Create A Video to save the recorded file.

Way 2. Record PPT and Webcam with Wondershare Filmora
There are some issues reported by users when they tried to record PPT with webcam such as video glitches, microphone sound not picking up and likewise. The best way to record PowerPoint presentation with webcam Mac and Windows is by using Filmora Screen Recorder . It is a premium software that is designed for recording video as well as editing videos like a professional. To record PPT with webcam, you need to record the screen along with webcam and microphone. Here are the steps you need to follow.
Step 1: Download and install Wondershare Filmora on your computer.
For Win 7 or later (64-bit)
For macOS 10.12 or later
Step 2: Open Filmora and click on New Project option.
Step 3: Go to Record and then go to Record PC Screen option.

Step 4: Set screen size which is likely to be full screen for PPT. Make sure to turn on Microphone option to record your audio.

Step 5: Click on Gear icon at the Gear icon and select “Record The Camera Stream” option to record the webcam along with PPT.

Step 6: When you are ready, click on Record button.
You will get a few buffer seconds to start your PowerPoint slides and start your presentation.
Step 7: Click on Stop button to stop recording whenever it is done and export the recorded file to save it.
Way 3. Record PPT and Webcam with Panopto
If you are looking for a free online video and screen recorder to record webcam with PowerPoint, Panopto is a great platform. The online platform of Panopto is super simple to use and the interface is as clean as it gets. With Panopto, you can record PPT with your narration in PiP mode as well as record PPT with your voice only. Here are the steps to follow to record PowerPoint with webcam on Panopto.
Step 1: Open PowerPoint and open your PPT slides and get ready for recording.
Step 2: Open your web browser and visit www.panopto.com/record/?capture.
Step 3: Connect your webcam and microphone and Panopto will automatically detect them. You can click on Audio and Video tab at the top to ensure that the devices are configured correctly and working properly.
Step 4: Click on Screen and Apps and select screen recording size which is likely to be Entire Screen in PowerPoint Presentation.

Step 5: Then click on Video to record your webcam video in PiP mode.
Step 6: Finally, click on Record button and start recording your presentation.

Step 7: When you are done, click on Stop button and on the next screen, you can download the recorded video.
Way 4. Record PPT and Webcam with Camtasia
Camtasia is a professional screen and video recorder with versatile video editing features. Before purchasing its premium plan, you can use its free trial version. You can capture anything on the screen starting from websites and PPT to video calls and gameplays. There is a PowerPoint Add-In available and you can even import PPT slides into Camtasia for convenience in recording PowerPoint presentations. Here are the steps to follow on how do you record a PowerPoint with a webcam
Step 1: Download and install Camtasia. Camtasia comes with PPT add-in so that you get the recording options directly from PowerPoint.
Step 2: Open PowerPoint and open the file where there are slides for presentation.
Step 3: Go to Add-In tab and you will see all the recording controls. If you cannot see Add-In tab, go to File> Options> Add-ins and enable Camtasia.

Step 4: Click on Recording Options to enable audio and camera recording.
Step 5: Turn on Record Audio option and Record from Camera option from Picture in Picture. And click on Ok button.

Step 6: Click on Record button and start your presentation.
Step 7: At the bottom-right corner, click on “Click To begin Recording” button.
Step 8: Press Esc on your keyboard to Stop Recording. You can save the recorded video on your hard drive.
Filmora Screen Recorder
Record computer screen and webcam
Capture system and microphone audio
Customize the target recording area
Edit videos with thousands of effects and tools
The Bottom Line
Hopefully, you have understood how do you record a PowerPoint with a webcam. You can do it using PowerPoint's inbuilt recording option as well as using an online recording tool. In both these methods, you do not need any external software but they have certain shortcomings. Hence, we recommend you Wondershare Filmora to record PPT with webcam and edit it before sharing and publishing on any platform.
You May Also Like
Best screen recording tips.
This article aims to show you the everything you need to know about screen recording. Follow this post to learn more in video recording and become a better video creator.
Best Game Screen Recorders
For a handy game recording software, we’ve got some top-of-the-list recommendations for you. Refer to know how to record gameplay on PC with easiness. Learn more here:
How to Screen Record on Mac
Searching for the best screen recorder to capture the screen activities on MacBook/Air/Pro? Here is the list of the top 10 best macOS screen recorder.
Ultimate Guide for Popular Screen Recorder ZD Soft
The article presents an overview of ZD Soft Screen Recorder features while covering the tutorial of its workability.
Du Recorder Features and Review
Let us increase your knowledge by sharing the most information about the brilliant DU Screen Recorder. You will get in-depth knowledge about its features and working.
How to Do Screen Recording on iPad?
Let us increase your knowledge regarding the iPad recorder for the screen. 5 distinct and popular applications will also be discussed.
Best Mac Screen Recorder with Audio
In this article, we have come up with the best free as well as paid ways to record Mac screen with audio easily. These software are easy to use and one of the best easy to get your work going without any hiccups.

How to Record Customized Camera Feeds With Cameo in PowerPoint
T he widespread adoption of remote work and virtual meetings has led many people and organizations to realize they don't have to be physically present in the same conference room to make presentations. In fact, you don't even need to conduct them live.
However, recording your PowerPoint slides with your face on them requires technical know-how and third-party apps like OBS. This makes recording presentations a bit difficult and discourages people from doing it.
Thankfully, Microsoft has addressed this issue in PowerPoint 365 with the Cameo feature. Here's what it is and how to use it.
What Is Cameo in PowerPoint?
Cameo is a PowerPoint feature that lets you add your webcam or any other camera feed into your presentation. This makes it easier to present virtually, as your audience can see you from within your slides.
Previously, you needed a third-party app like OBS to overlay yourself on your presentation. You can also use a green screen overlay in Capcut or other similar apps to achieve the same effect. However, this takes a lot of effort and know-how.
But with this feature, you can do it from inside PowerPoint with just a few clicks. Here's how to insert a cameo into your slides.
- Go to Insert > Cameo .
- After clicking on Cameo, PowerPoint will insert a placeholder object on your current slide and open the Camera Format tab.
- You can edit the object as you wish, much like any other shape on PowerPoint. You can also click on the options in the Designer pane on the right side of the screen to help you work faster.
- Once you're happy with its placement on your slide, click on the Preview button to see your live video.
With that, you can start presenting your PowerPoint slides via screen sharing while still keeping yourself on the screen.
How to Record Your PowerPoint Presentation With Cameo
You can also insert a cameo from Record > Cameo . Clicking on this will bring you to the same menu tab and insert a placeholder object for your video. However, even if you didn't set up Cameo beforehand, you can insert it directly while recording your presentation. Here's how:
- Go to Record > From Beginning or Record > From Current Slide .
- In the recording screen, click on the Camera icon at the top. This will insert a round object containing your video in your slides' lower-right-hand section.
- Click on the Red icon to start recording your presentation.
- Go through your presentation as usual. For more information, check out our guide on turning your presentations into videos .
- Once you've finished, click the Red icon again to stop recording.
- Click Export to go to the Export to video screen .
- Change the File Name as needed, then click Browse to select the location where you will save your recorded video.
- Once done, click Export Video .
With that, you don't have to spend much effort to add your video feed to your PowerPoint presentation recording. However, the app only places your video at one location across every slide; it might cover some of your content. That's why it's better to use the Cameo feature when you're building or editing your PowerPoint presentation.
If you're unhappy with your recording, press the Retake Video on the left of the record icon. You can pick between On Current Slide or On All Slides .
What You Need to Record Customized Camera Feeds
You need a webcam and a Microsoft 365 account to record your customized camera feed. Furthermore, you cannot use Cameo or record presentations in the PowerPoint web app. You need to download and install it on your computer to use these features.
The Cameo feature is already available on Microsoft PowerPoint 365 in Windows and Mac. However, recording your presentation with Cameo is only available on Windows. As of the time of writing, this feature isn't available for the main PowerPoint 365 for Mac version.
If you're running macOS, you must be a Microsoft 365 Insider to get this feature. However, since the Cameo recording feature is already announced in the Microsoft 365 Insider blog , we hope it will be available in the mainstream PowerPoint for Mac version in a few months.
Recording Your Presentations Is Now Much Easier
The Cameo feature has made presenting PowerPoint slides in video calls easier. And with the recording function, you no longer need a third-party app to put your video over your presentation.
You can integrate it into each slide, allowing you to control where you are on your screen. And you also save a lot of time and effort, as you can record and save your presentation as a video from within Microsoft PowerPoint.


Presenting with cameo
With cameo , you can insert your live camera feed directly on a PowerPoint slide. You can then apply the same effects to your camera feed as you can to a picture or other object, including formatting, transitions, and styles.
Cameo is available to Microsoft 365 subscribers in the desktop app for Windows or macOS.

Select Insert > Cameo . A placeholder for the camera feed will appear on the slide.

Note: In a shared document, only you see your video feed.
In the Camera tab, select the arrow below the Preview button to select other cameras. Only one video feed can be used on a slide.

Use the picture anchors to adjust the size and placement on the slide.
You can also cut-and-paste the camera feed, plus use Animations and Transitions , like Morph . Design Ideas also work with cameo.
Select Slide Show (in the ribbon) to present using cameo.
Tip: In addition, if you have a "preview" version of PowerPoint Live in Teams, you can use cameo to present directly in a Teams meeting with PowerPoint Live. For more information, see Cameo in PowerPoint Live in Teams .
More details: Integrate a live camera feed into your presentation
Present from PowerPoint in Microsoft Teams
Use the Morph transition in PowerPoint
Creating a cameo in PowerPoint for the web is currently not supported.
If you're attempting to view an existing cameo in PowerPoint for the web, you'll see a notification that cameo is currently only available in the PowerPoint desktop app on Windows or macOS.
To modify an existing cameo or to insert a new cameo into your presentation, use the PowerPoint desktop app on Windows or macOS.
Open a PowerPoint file in a desktop app from PowerPoint for the web
To open a PowerPoint file in a desktop app from PowerPoint for the web, select the Editing drop-down and select Open in Desktop App .

The presentation will open on the PowerPoint desktop app on Windows or macOS.

Need more help?
Want more options.
Explore subscription benefits, browse training courses, learn how to secure your device, and more.

Microsoft 365 subscription benefits

Microsoft 365 training

Microsoft security

Accessibility center
Communities help you ask and answer questions, give feedback, and hear from experts with rich knowledge.

Ask the Microsoft Community

Microsoft Tech Community

Windows Insiders
Microsoft 365 Insiders
Was this information helpful?
Thank you for your feedback.
Contribute to the Microsoft 365 and Office forum! Click HERE to learn more 💡
March 14, 2024
Contribute to the Microsoft 365 and Office forum!
Click HERE to learn more 💡
Top Contributors in PowerPoint: Steve Rindsberg - Jim_ Gordon - John Korchok ✅
March 11, 2024
Top Contributors in PowerPoint:
Steve Rindsberg - Jim_ Gordon - John Korchok ✅
- Search the community and support articles
- Microsoft 365 and Office
- Search Community member
Ask a new question
Camera recording in PowerPoint 2016
I am working on PowerPoint 2016 and trying to set up a recording for the slides.
I have followed the instructions on this Support Website , and have managed to get into recording mode, but on the support website it seems that the webcam should automatically activate and provide additional buttons for switching it on and off. I do not get webcam footage or those buttons...
Can anyone help with this problem?
Report abuse
Replies (5) .
- Microsoft Agent |
Hello Steven,
For better assistance, we'd like to ask the following:
- Can you send us a screenshot of what you are seeing after you customized the ribbon in PowerPoint?

- What's the device you are using when you are setting up the record on your PowerPoint?
- Are you trying to use a built in webcam or USB webcam?
We are looking forward to your reply.
23 people found this reply helpful
Was this reply helpful? Yes No
Sorry this didn't help.
Great! Thanks for your feedback.
How satisfied are you with this reply?
Thanks for your feedback, it helps us improve the site.
Thanks for your feedback.
Hi Ernie San,
Thanks for the quick reply!
Screenshots f the ribbon and the recorder mode are below, as you can see, it is indeed those three buttons that are not there.
I am using a Dell Inspiron 13-5378, with a built in webcam.
Please let me know if more information is needed. I Appreciate the help!

13 people found this reply helpful
Thank you for the screenshot, seems that your PowerPoint have a corrupted or missing files. The best way to isolate and automatically repairing your PowerPoint is by downloading and running Microsoft Office Configuration Analyzer Tool. To do so, check this link . For the step-by-step instructions, click Install Instruction in the same article.
After trying the Office Configuration Analyzer Tool, you may test and check the behavior of your PowerPoint if you'll enable to find the button for webcam in recording page. Now, if you were unable to find the webcam button here are the following things that we can do:
- Ensure that your webcam driver is up-to-date. If not, kindly manually download the latest version from the Device Manager. You may also try uninstalling and reinstalling your webcam driver, that you can visit from your manufacturer support page of your device.
- Uninstalling and reinstalling your Office application to ensure that you are using the latest version of Office. This is one of the factor why specific feature is missing in your PowerPoint. Here are the detailed instructions on how to uninstalling and installing your Microsoft Office 2016. • Uninstall Office 2016, Office 2013, or Office 365 from a PC • Download and install or reinstall Office 365 or Office 2016 on your PC or Mac
Let us know the result.
3 people found this reply helpful
Unfortunately no success yet... I have tested office with the suggested program, updated the camera drivers (and tested the camera in two other programs; Skype and Dell Webcam Central) and Office was just installed this week, so I'm sure it was the latest version.
Could it be because I am using an Office 365 licence? I have added the details of my specific PowerPoint version below.
Anything else you can think of?
Thanks again,

***Personal information deleted by the moderator. Please see the Microsoft Community Frequently Asked Questions for more information on how you can protect your privacy.***
1 person found this reply helpful
The version that you are using is the latest one. For further assistance, we suggest contacting our Answer Desk on this link .
2 people found this reply helpful
Question Info
- Norsk Bokmål
- Ελληνικά
- Русский
- עברית
- العربية
- ไทย
- 한국어
- 中文(简体)
- 中文(繁體)
- 日本語
COMMENTS
You can record your PowerPoint presentation—or just a single slide—and capture voice, ink gestures, and your video presence. The completed recording is like any other presentation. You can play it for your audience in Slide Show or you can export it as a video file. So instead of just handing the deck to someone, people can see your ...
In the Options dialog box, click the Customize Ribbon tab on the left. Then, in the right-hand box that lists the available ribbon tabs, select the Recording check box. Click OK. To get ready to record, select Record on either the Recording tab or the Slide Show tab of the ribbon.
Choose a slide, go to the Insert tab, and select "Cameo" in the Camera section of the ribbon. You'll see the Cameo object appear on your slide. To choose the camera you want to use, if you have more than one, select the object and go to the Camera tab that appears. Click the Preview (Camera Preview on Mac) drop-down arrow on the left side of ...
Open the slide you want to start recording from. Near the upper right corner of the PowerPoint window, select Record. When you're ready, select the round, red Record button, wait for the countdown, then start speaking. To record from a specific slide, go to it, and then select Record. Note: Narration isn't recorded while the transition between ...
Open Microsoft PowerPoint and navigate to the record tab. To start your webcam recording in PowerPoint, head over to the PowerPoint application. Next, click on the record tab to launch recording options. Step 2. Select the cameo option to enable your webcam. Click on the cameo button on the record toolbar.
Learn how to record your webcam over the top of your presentation in Microsoft Powerpoint.Integrate scholastic gaming experiences into your school with STEM ...
Click on Record > From Current Slide. 6. PowerPoint Recording screen will get open. Now, from the upper right corner of the screen. Click on the speaker settings icon. Now, do select your Webcam and Microphone. 7. Once you see yourself in the webcam, click on the Record button. And, recording will get started.
Read also: How to record PowerPoint with audio. Capture Webcam and PowerPoint using the PPT Recording Function. Since Microsoft PowerPoint offers the in-built recording function, you can use it to record a presentation with webcam. It lets you use narration and choose the camera input.
Open the Slide Show tab and select Record Slide Show . Select the Record button on the toolbar to start recording your narration. Use your keyboard arrow keys to move back and forth between slides. Press N or Space Bar to move to the next slide or animation in the presentation.
Follow the steps below to add live webcam video to a PowerPoint presentation: Select Cameo from the Ribbon. Drag and drop Cameo to the preferred spot. Navigate to Camera Styles. Change Camera ...
How to record a presentation from PowerPoint with audio and webcam with any freeSoftware ... The ability to use the webcam as part of recording a narration was introduced after the release of Office 2016 and is not a part of that package. ... If it is worth it to you, you could use a free 30-day trial of Microsoft 365 to record your ...
For this, you need Microsoft PowerPoints, a Microphone, and a Webcam. Follow the following steps to record your presentation with a built-in recorder. Go to 'Record Slideshow' in the 'Slideshow Tab'. If you want to record your screen, then go to the 'Insert' tab and select 'Screen Recording'. If you want to add your audio to ...
The webcam can usually only be connected to one app, so leave it connected only to the Camera app. If you need to share your webcam in the meeting, stop sharing it before you present. Make sure the PowerPoint presentation is in Slide Show mode, which will show the slides only in the PowerPoint window.
When you are finished recording, save your presentation: File > Save.The recording is now embedded on the slide you selected in step 1. To save the recording itself as a separate file on your computer, right-click the picture on the slide that represents the recording, and select Save Media as.In the Save Media As dialog box, specify a file name and folder location, then click Save.
More than a PowerPoint recorder. VEED is a complete browser-based tool that lets you do so much more than just record and share your Microsoft PowerPoint presentations. You can annotate your videos to make your presentation more informative. Edit your recording to add images, subtitles, and more. It is a professional all-in-one video-creation ...
Here are the steps to record PPT with webcam without installing any external software. Step 1: Open PowerPoint and your presentation file. Step 2: Go to Slide Show tab and click on Record Slide Show. Step 3: On the next screen, go to Settings located at the top-right corner. Select webcam and microphone properly.
You need a webcam and a Microsoft 365 account to record your customized camera feed. Furthermore, you cannot use Cameo or record presentations in the PowerPoint web app.
Enabling webcam recording in powerpoint 2016. I have been trying for a long while but couldnot find any way in enabling webcam recording for powerpoint presentation in powerpoint 2016. I could only proceed to getting an audio recorder along with a recording slide and a running timer and no webcam recorder ever appears.
How to record screen on Windows 11 with sound via PPT: Step 1: Access the Screen Recording Feature. Open your PowerPoint presentation. Navigate to the "Insert" tab on the ribbon. In the "Media" section, click on "Screen Recording." Step 2: Select the Area to Record. After clicking on "Screen Recording," a control dock appears at the top of your ...
Try it! Select Insert > Cameo. A placeholder for the camera feed will appear on the slide. Select the Preview icon in the placeholder to turn on the camera feed. Note: In a shared document, only you see your video feed. In the Camera tab, select the arrow below the Preview button to select other cameras. Only one video feed can be used on a ...
@MiekeWin I don't think this is currently possible on a Mac - but it is in PowerPoint for PC. We recommend students who use a Mac use a tool like Apowersoft if they need to record their webcam on top of their PowerPoint. This is a guide I created for students on using Apowersoft on a Mac. No need to register or download software.
To do so, check this link. For the step-by-step instructions, click Install Instruction in the same article. After trying the Office Configuration Analyzer Tool, you may test and check the behavior of your PowerPoint if you'll enable to find the button for webcam in recording page. Now, if you were unable to find the webcam button here are the ...